Vendor Setup
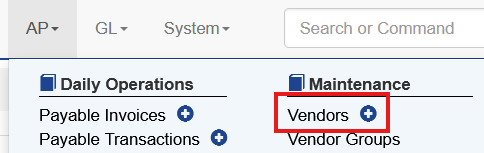
To add a new vendor select AP - Vendor, or click the Plus Sign to go directly to vendor creation
Required Information
When creating a new vendor the Short Code, Name, Phone, Address 1, City, State and ZIP are required fields.
If the vendor is active choose Active Vendor
Optional Information
Main Tab
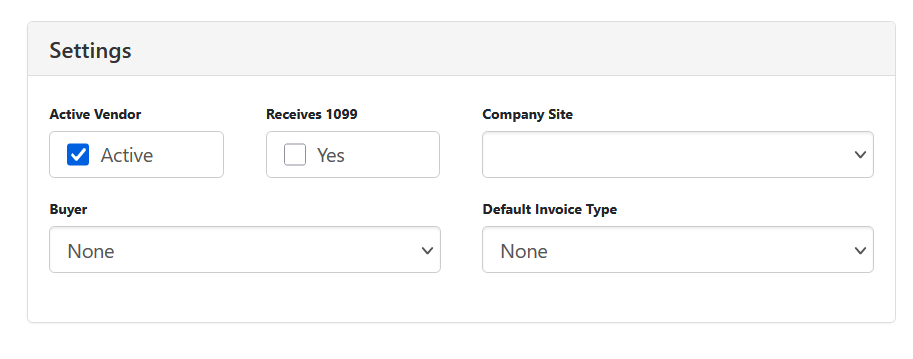
Company Site: This is the primary Company Site that will use this vendor. It can be left blank
1099 Check Box: If this vendor gets a 1099 at the end of the year indicate it with this box
Default Payable Invoice Type: Choose if this is an Inventory or Expense vendor by default
Accounting Tab
Tax ID: This allows the system to keep up with tax information for end of the year reporting
Non PO Vendor: Does not require a PO to create a purchase order
Terms: The selected terms for the vendor
Credit Limit: Total credit limit extended by the vendor
Default General Ledger Accounts
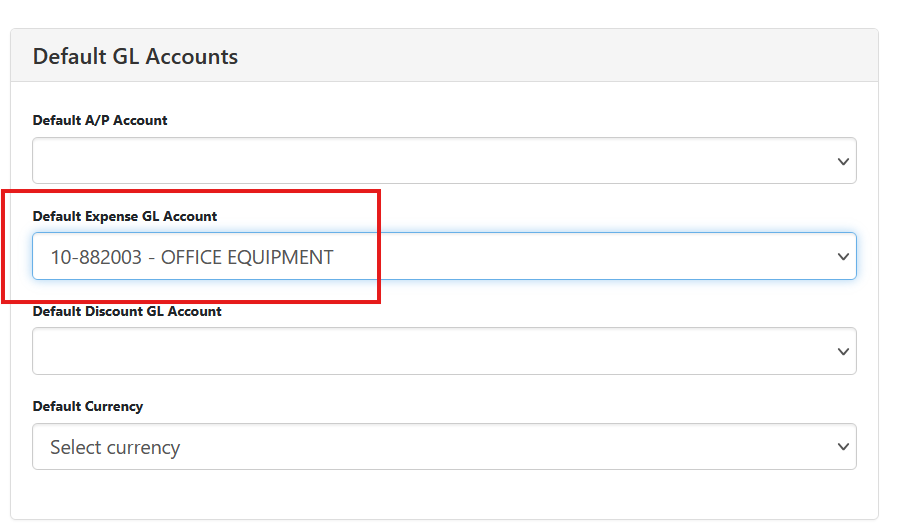
When certain vendors are created the user may wish to automatically code where certain charges go, such as Expenses. Under the Accounting tab the user can select default accounts. One common use is the default expense account.
When a payable is entered the distribution section is automatically populated with the vendor specific expense account.
Before setting a vendor specific general ledger account the GL account must be created.
Pickup Locations
Some vendors may direct a pickup to a specific location, often referred to as a shed. To maintain pickup locations in Sprout choose the Pickup Location
This will show current pickup locations as well as allow the user to set a default or add new ones
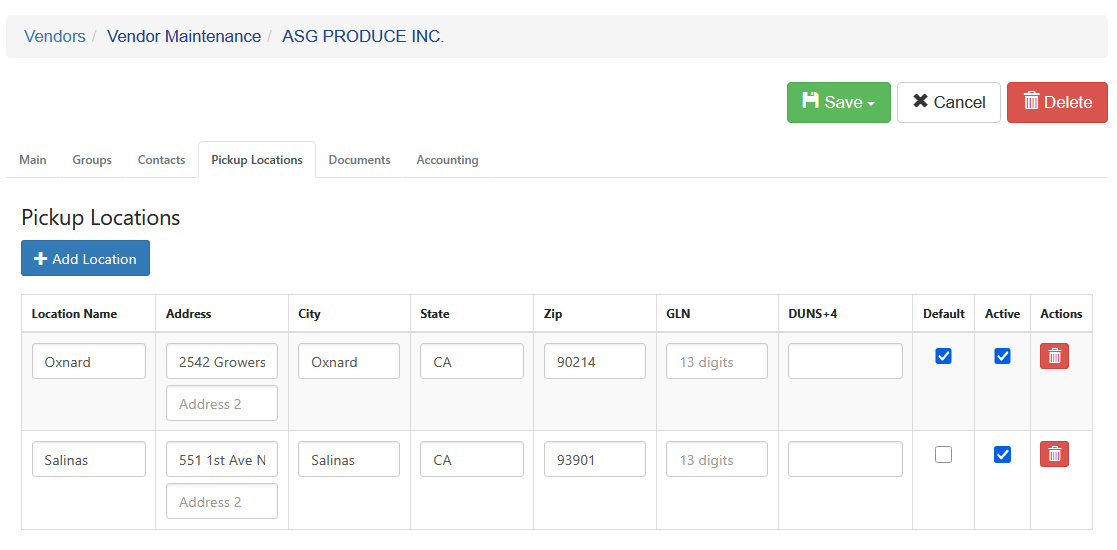
When a PO is created for a vendor with multiple locations the default will show when the PO is created, but the user can select others.
Additional Remit Addresses
Some vendors may have an address for paymets that is different from their primary address. This is often the case when a vendor users a lockbox or similar to process. Under vendor setup there is an option for Remit Addresses. Choose this tab and select Add Remit Address
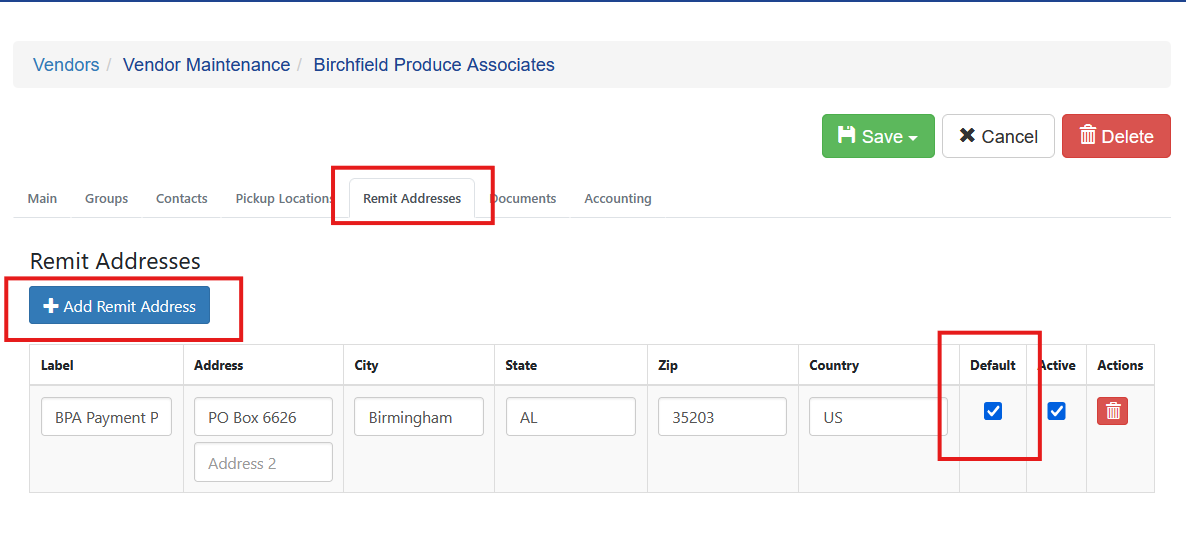
Enter the address information. If this is where payments should go by default select Default. These options are shown on the payable entry screen as well.
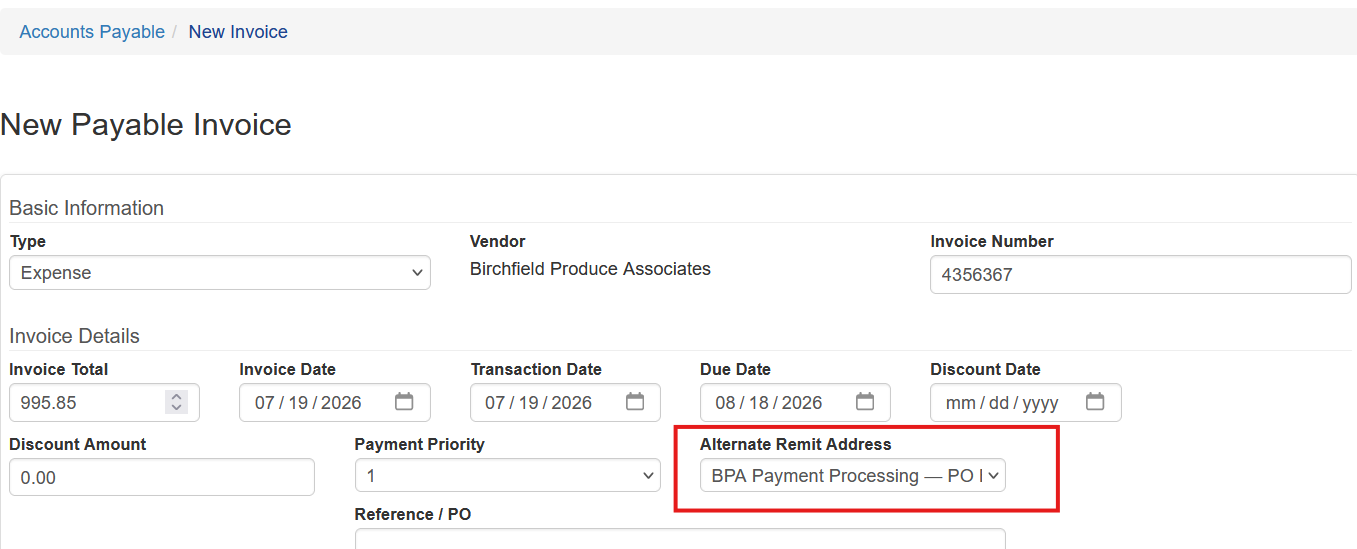
The user can choose any Remit Address during the payable entry, the check will be printed for the choose address.