App Overview
Below is a step-by-step overview of the Sprout Driver app, including securely logging in and completing a delivery.
Logging In
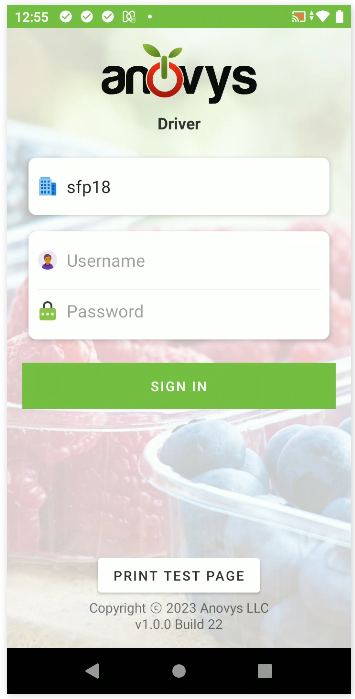
Three pieces of information are required by a driver to log in and complete deliveries:
- Organization Code (provided by Anovys, denoted by building icon)
- Username (known to the driver, denoted by person icon)
- Password (known to the driver, denoted by lock icon)
NOTE: You can find the version and build number on this screen. This may be asked if you are having technical difficulties with the system.
Below is a screenshot of the app login screen:
Single Sign-On
Once a driver logs in, their session stays alive until 1 hour of inactivity. If a driver exits the app and comes back in, it will automatically log them in within the 1 hour window. Single sign on disables after 1 hour of inactivity or when the driver logs out.
Choose The Delivery Date
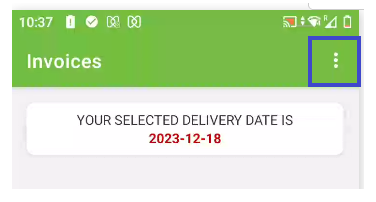
The delivery app will default to the calendar day for your deliveries. If you need to work with deliveries for a different calendar day, such as an overnight run, click the three dots at the top of the Order List page and choose Change Delivery Date. Chose the correct date and click OK.
Orders List (Manifest)
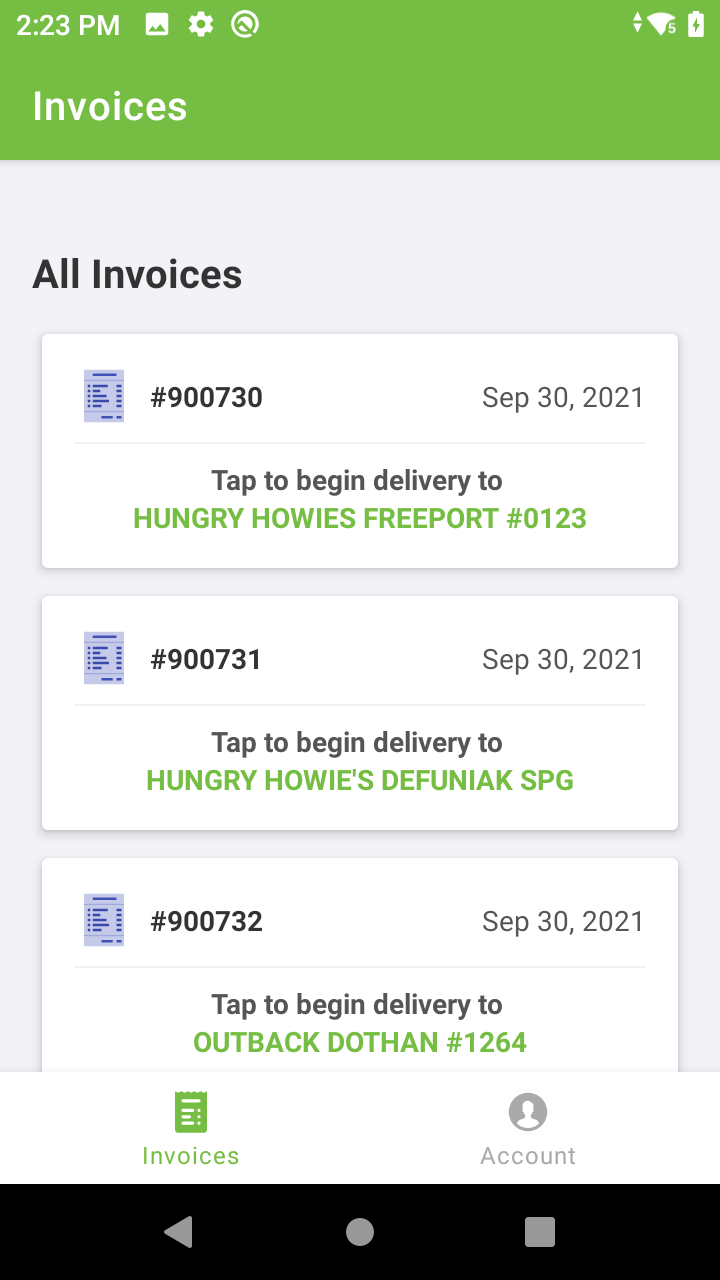
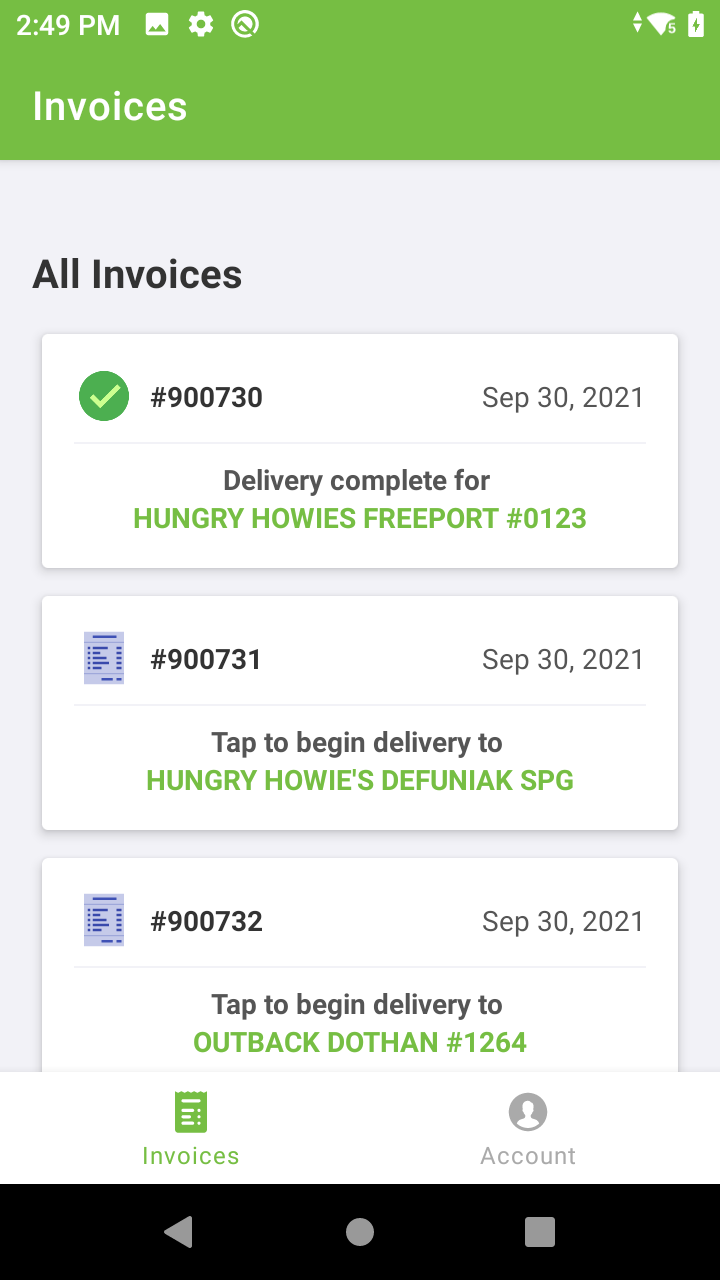
Once a driver logs in, they are presented with the list of outstanding delivery orders for the day in the desired order of delivery. Information for each order includes date, customer name and invoice number. Deliveries to be completed are denoted by the invoice icon while completed deliveries are denoted by a checkmark. A screenshot of the order list can be found below.
Deliveries in Progress
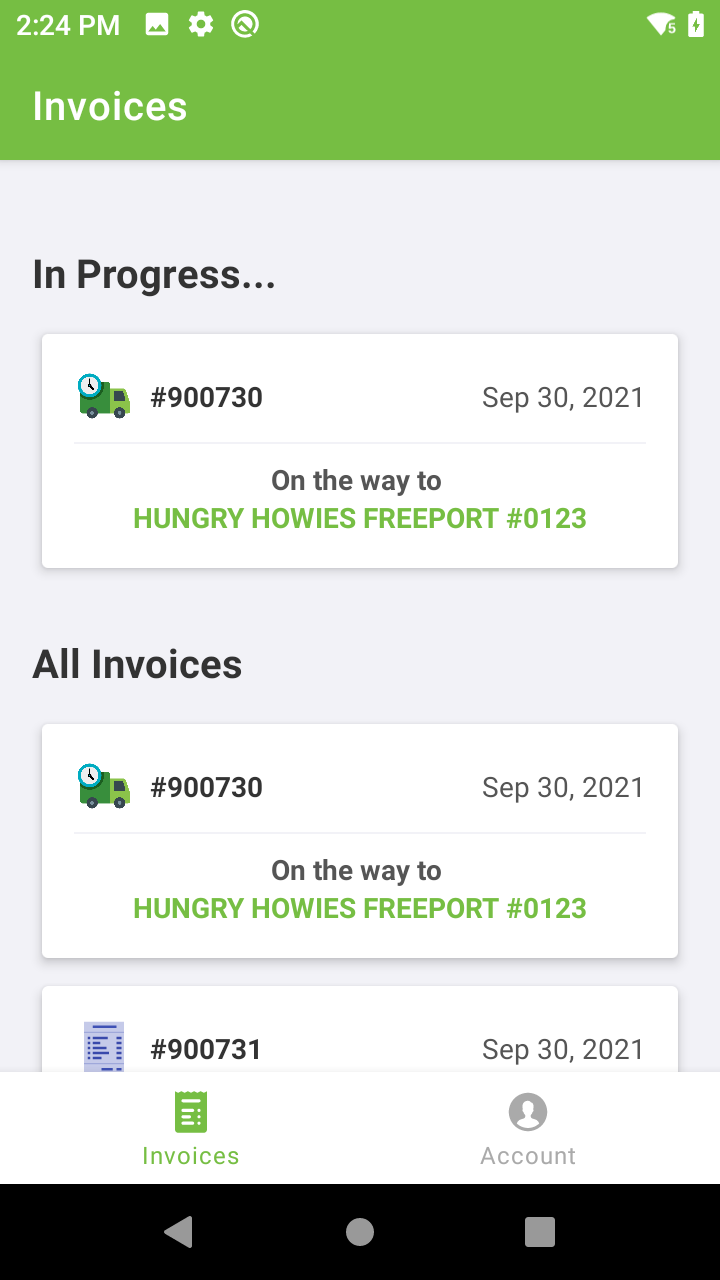
There are many instances in which a delivery is interrupted for known or unforeseen reasons. To account for this, Sprout Driver saves the delivery progress at each step such that the delivery may be resumed at a later time. Orders that are in progress are denoted by a special section at the top of the orders list and, when tapped, forward to the last known stage of the delivery. Entries in the list also reflect the current delivery state for convenience. An example of an in-progress delivery can be found below.
Making a Delivery
This section discusses how to complete a delivery using the Sprout Driver Android app. A driver moves from a series or “delivery states” numbered below for your convenience in the order they are presented.
- On the Way
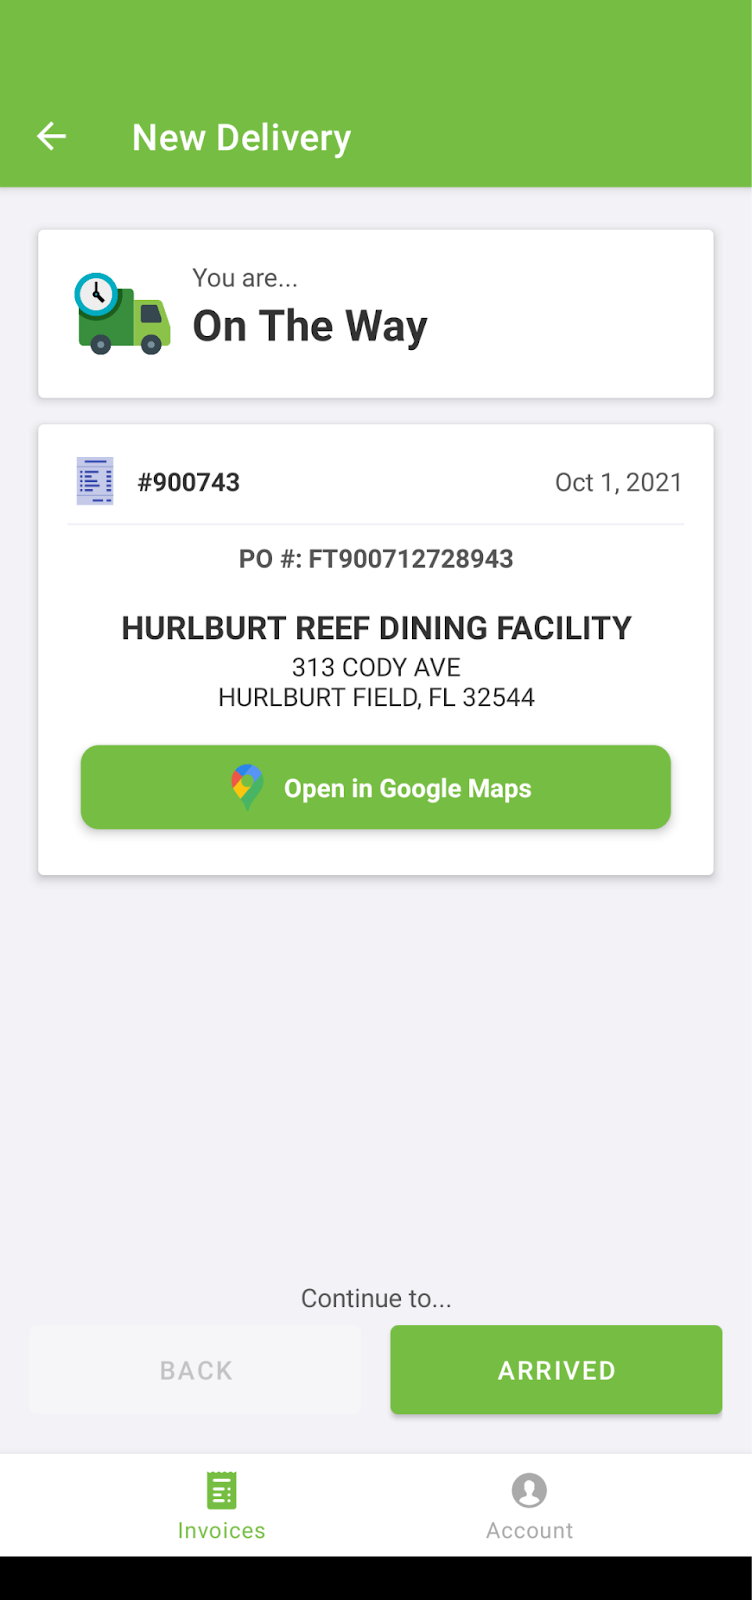
A delivery begins when a user taps an order on the orders list page. Every new delivery starts out with the state of “On the Way”. The driver would select this state when they begin driving to a customer. Upon arriving on-site with a customer, the driver would click the “ARRIVED” button. A screenshot of this delivery state can be found below.
- Arrived
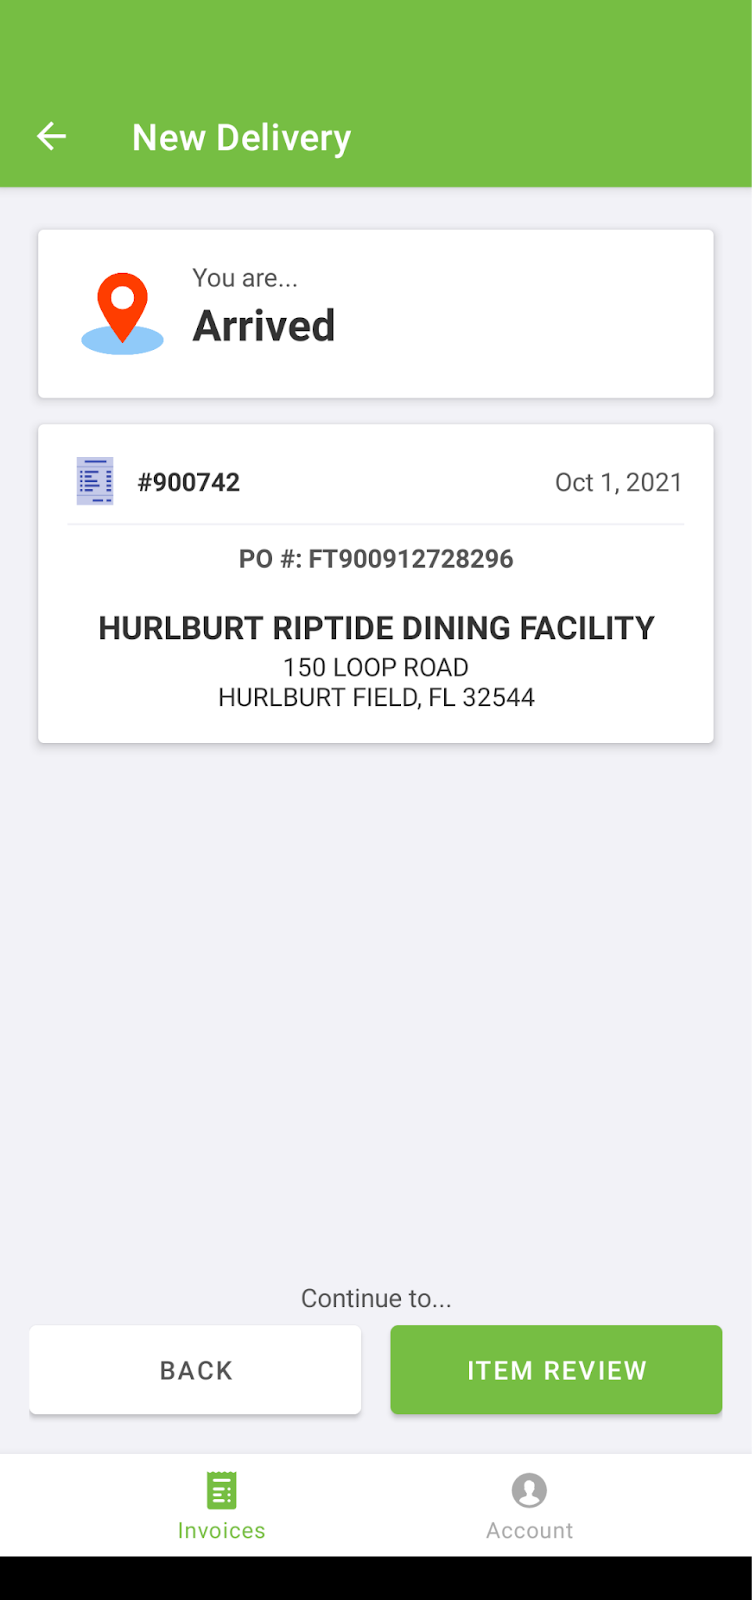
This delivery state begins when a driver arrives on site and ends after the driver has prepared the physical packages for customer review and signature. When the driver is ready for the customer to review the order, they tap “ITEM REVIEW”. A screenshot of this delivery state can be found below.
- Item Verification
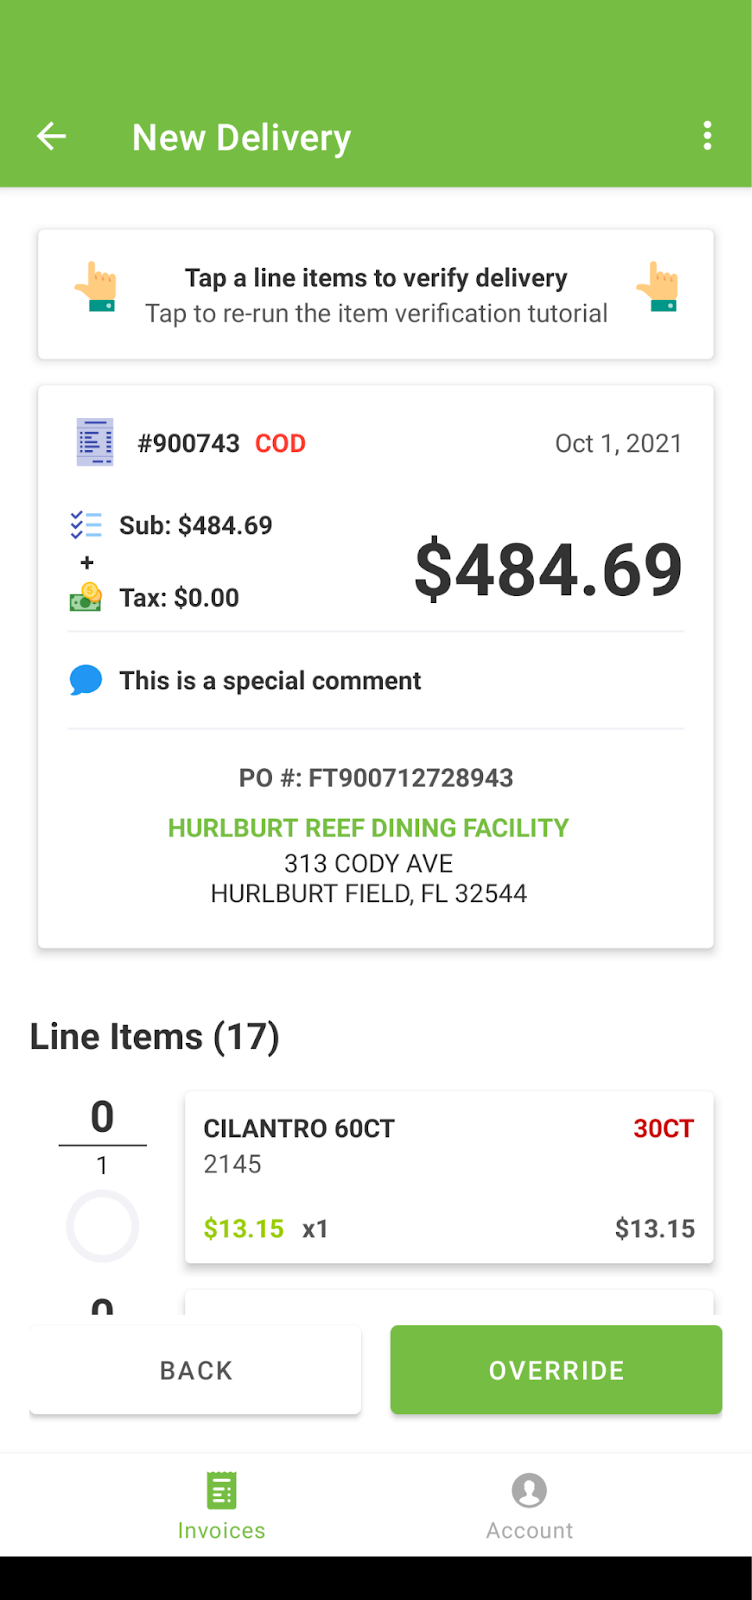
This delivery state is for reviewing and verifying the delivery of all items to the customer as well as the order’s line-item and total prices. There are three possible “modes” for item verification: no-verify, tap-to-verify, and scan-to-verify. Check with Anovys to coordinate which of the modes your business would like to operate in.
Tap to Verify
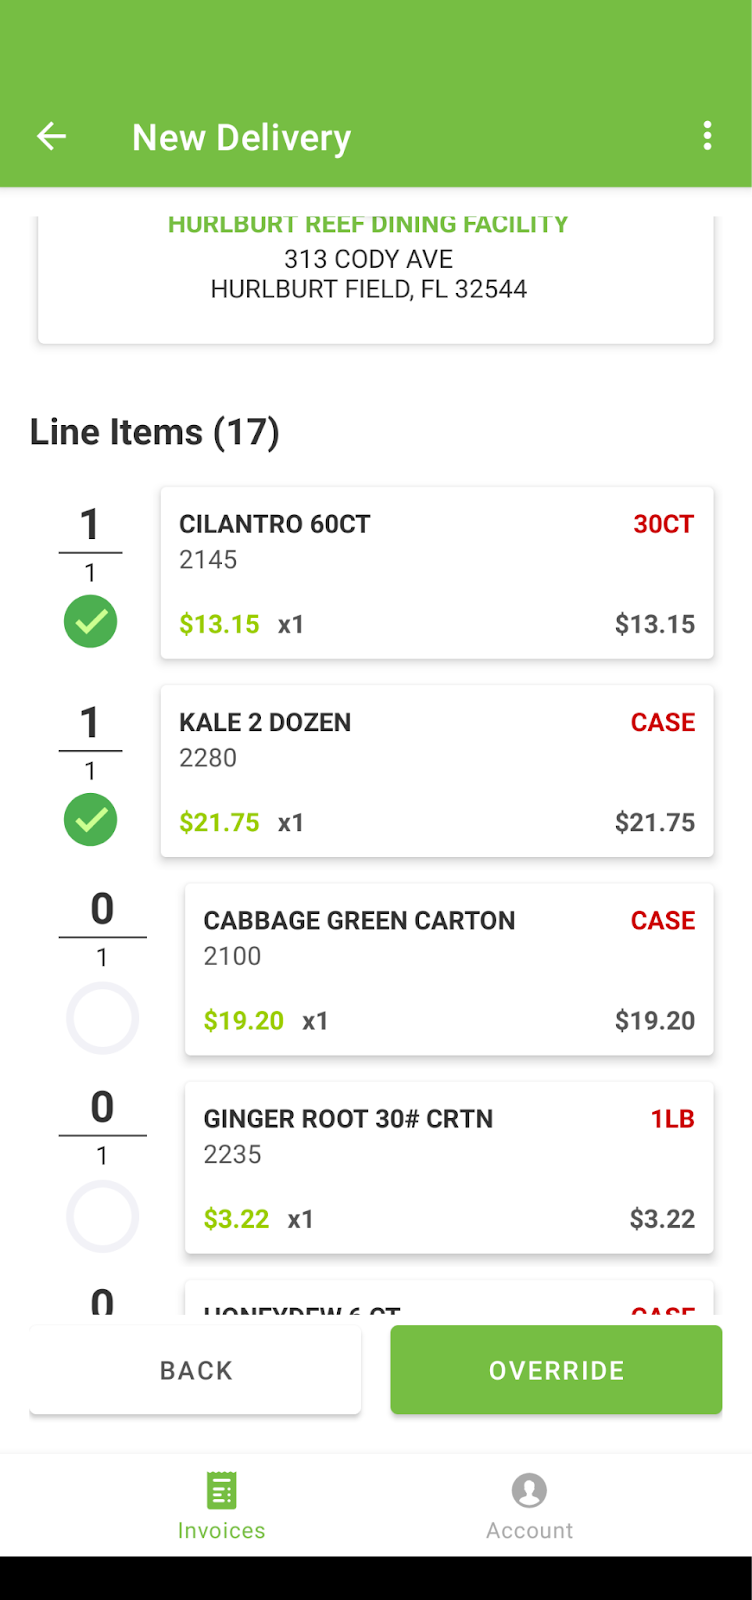
Pictured below is the tap-to-verify method of item verification. In this mode, a driver will tap on each line item to verify its delivery status. If there are more than one of the same item to be delivered, the line item must be tapped multiple times. Once a line item has been fully verified, a green check mark will appear to the left of the line item information.
Scan to Verify
Scan to verify mode relies on a hardware IR scanner built into an android device (e.g. zebra or cipherlab) to scan QR codes on labels and verify items without having to find them in the list. Simply point the scanner at a label, hold down the scan button (usually on the side of the device) and the app will handle verifying the item.
Item Unverification
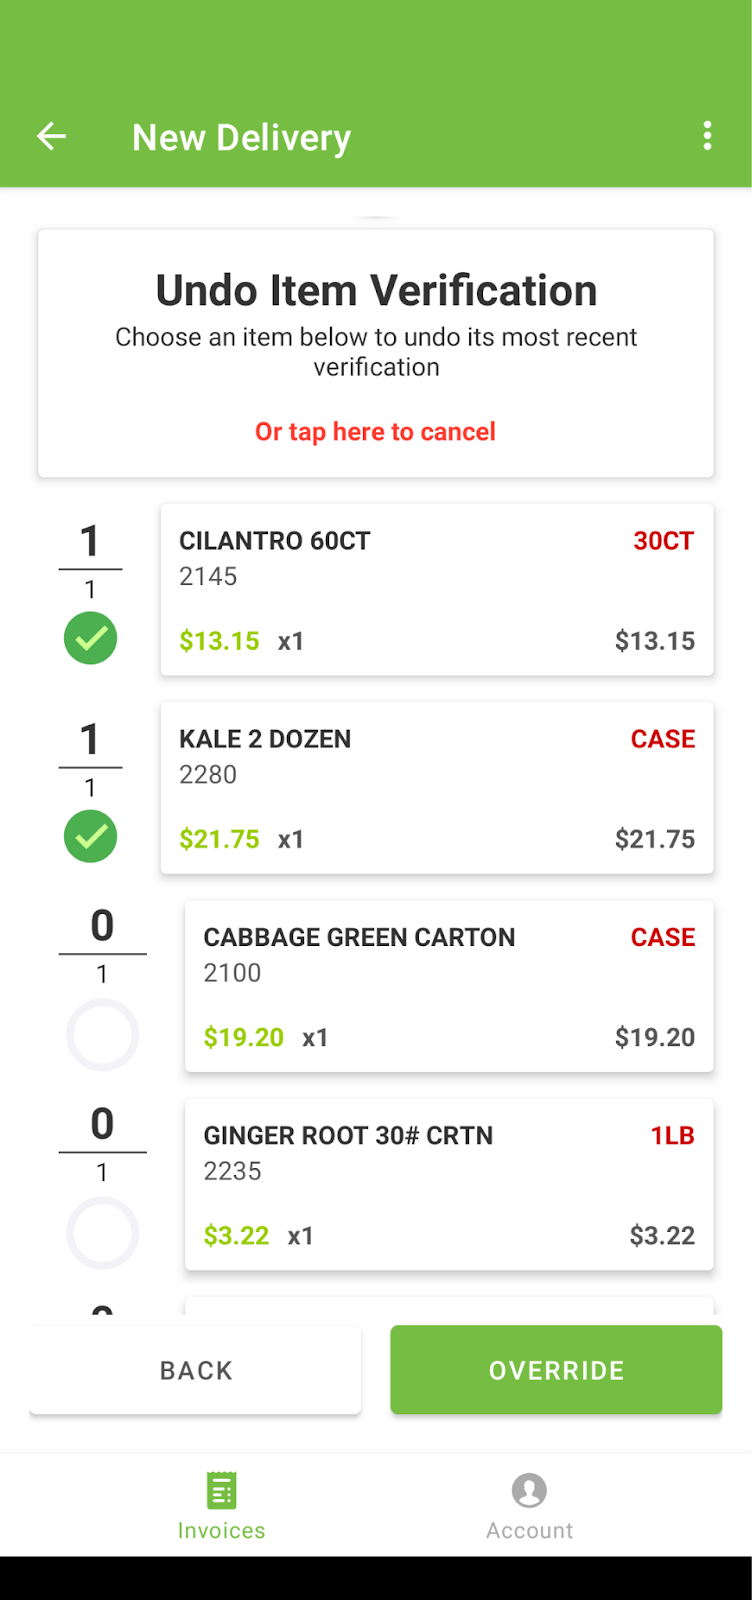
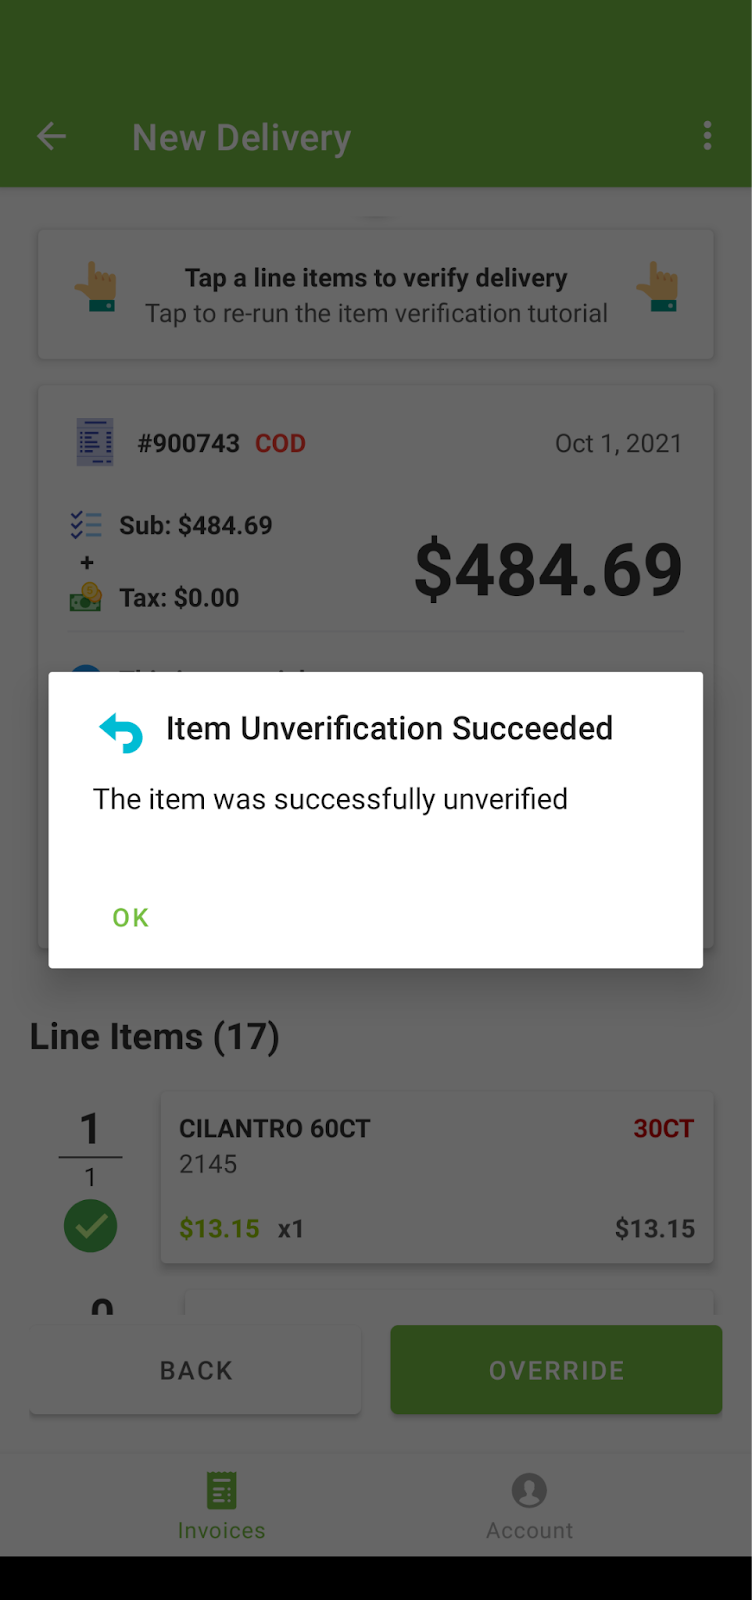
Occasionally, a driver may incorrectly verify an item. When this occurs, the driver may select the vertical 3 dots in the top right corner of the screen and then “Unverify Item”. Then, they may choose the line item they wish to unverify, which will decrement the verification number by 1. A picture and confirmation of this screen are shown below.
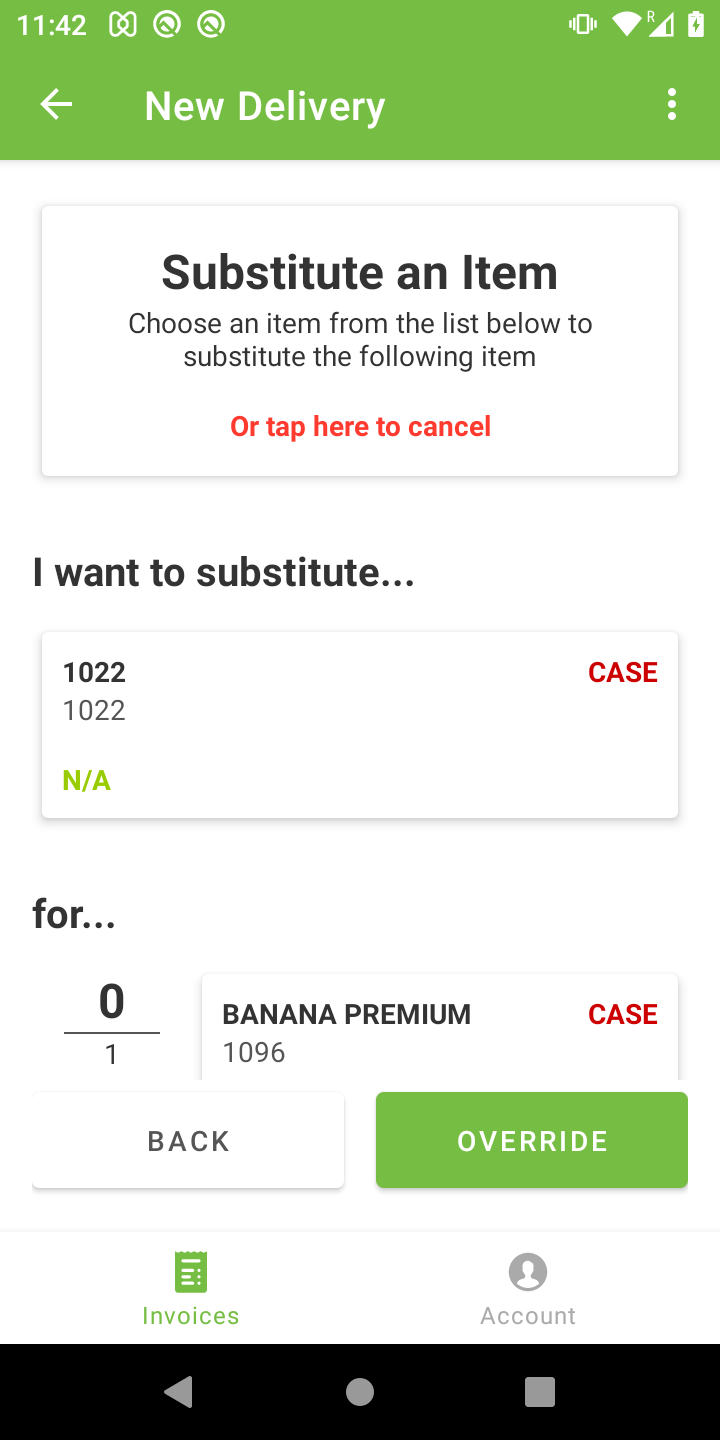
Item Substitution (scanning only)
The scan to verify mode of item verification also supports item substitution. To trigger the item substitution mechanism, a driver must scan a QR label for an item that is not in the list of items for the invoice. From there, the driver may tap on the line item they want to replace. A screenshot of this is below.
Successful Verification & Overrides
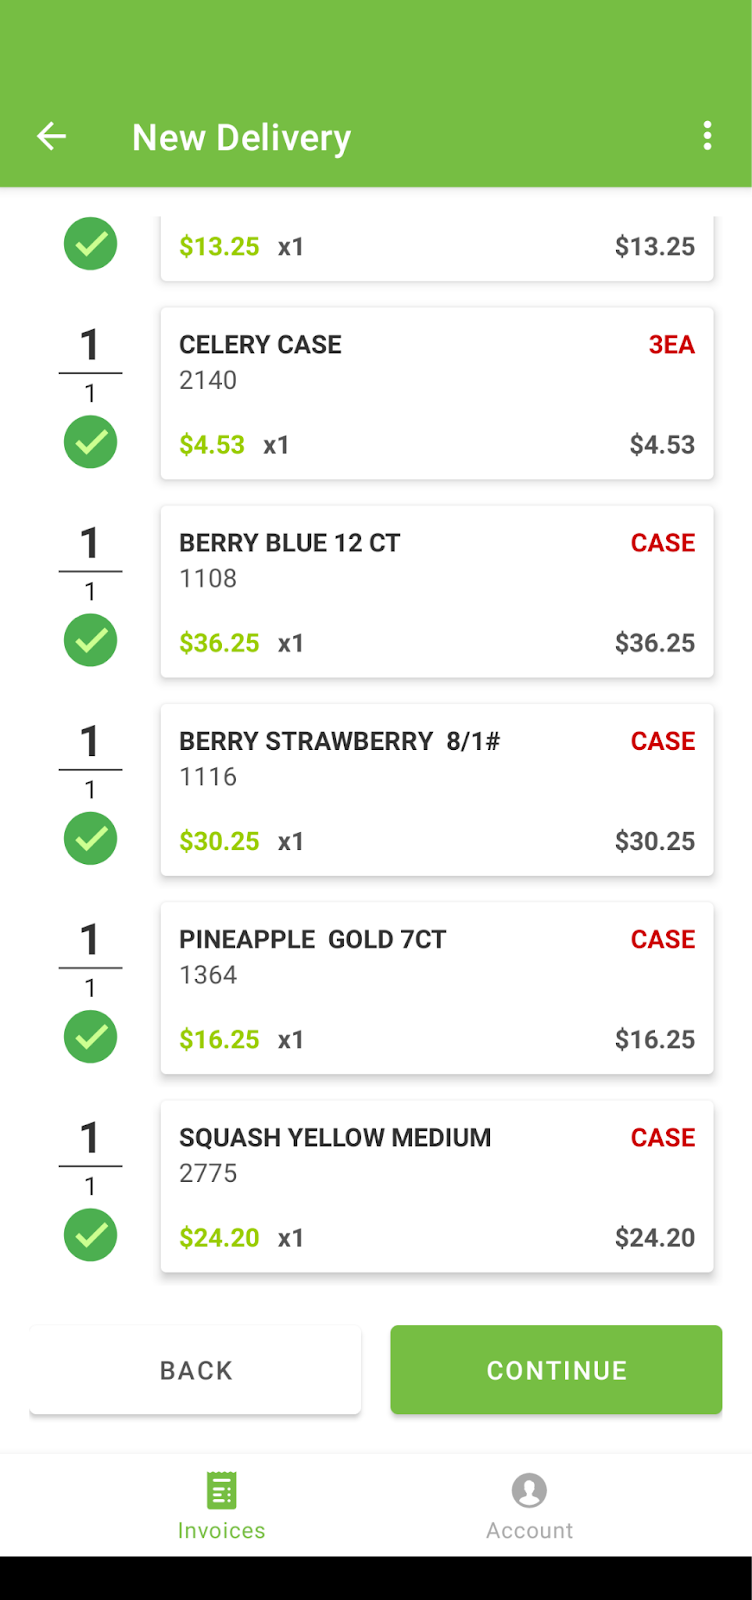
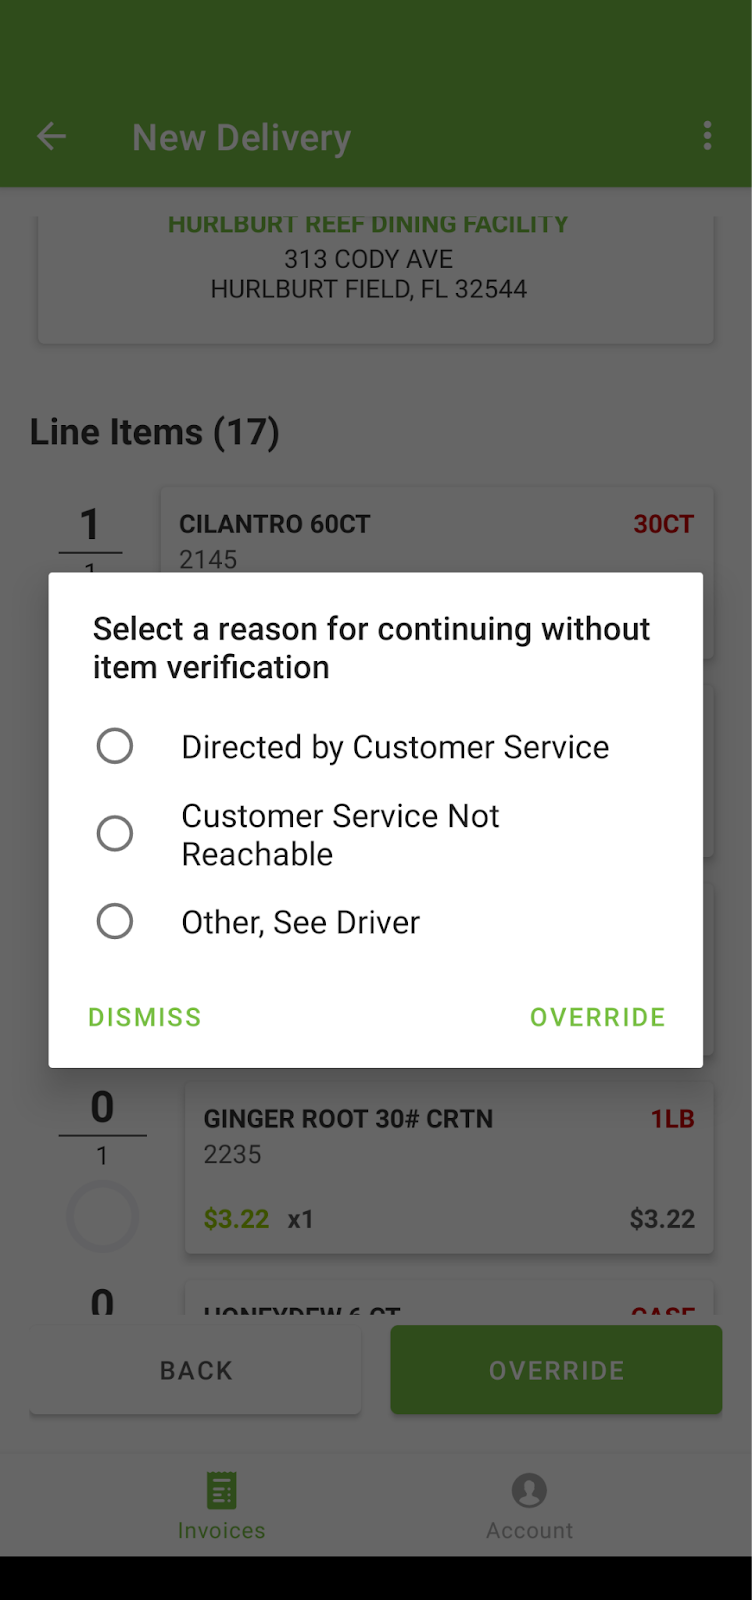
There are two ways to proceed from the invoice verification screen. The first is to verify all items (pictured below) which will change the proceed button in the bottom right corner to “continue”. However, in some cases it may be necessary not to verify all invoice items and simply proceed. This is called an “override”. Whenever a delivery driver overrides invoice verification, they receive a popup asking for them to choose a reason why. Your agency is notified via email which items were not verified and the delivery process continues.
Changing Invoice Shipped Quantity
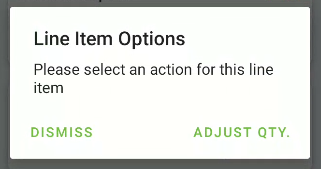
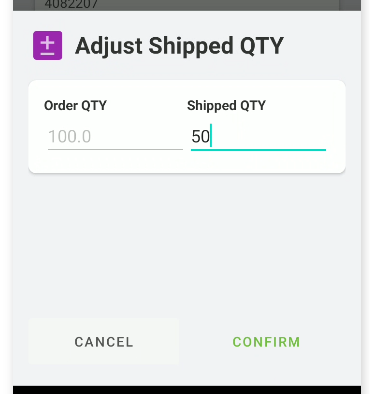
When a customer rejects items, the driver should update the item’s shipped quantity. To make this change, click the three dots on the item and select Adjust Quantity
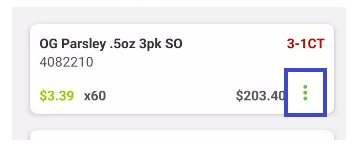
Enter the updated quantity and click Confirm
Choose the appropriate reason for the modification and click Confirm. This will update the order in Sprout.
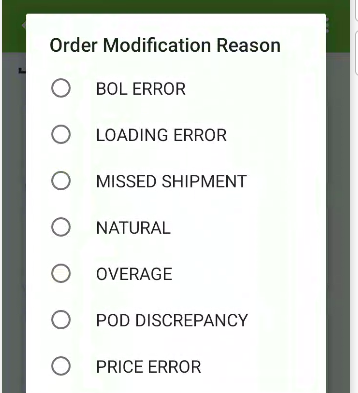
NOTE: The Order Modification Reasons on the handheld are limited to the reason marked for Display on Driver App in Sprout.
Handling Customer Rejection of an Order
In some cases, a customer may reject an order due to an incorrect item or amount. If this happens, the preferred solution is to contact customer support who will make the appropriate changes to an order. Once complete, the driver may pull-to-refresh on the item review screen to get an updated item list for customer approval.
- Proof of Delivery
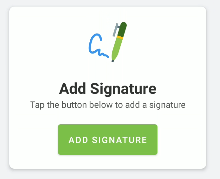
Once the delivery is complete you will be prompted by the handheld to capture proof of the delivery. Customers are set up in Sprout to capture this proof via a signature on the screen, a photo of a receipt from the receiving docks or both. The hand held will show you what is required, similar to the images below
Signature Capture
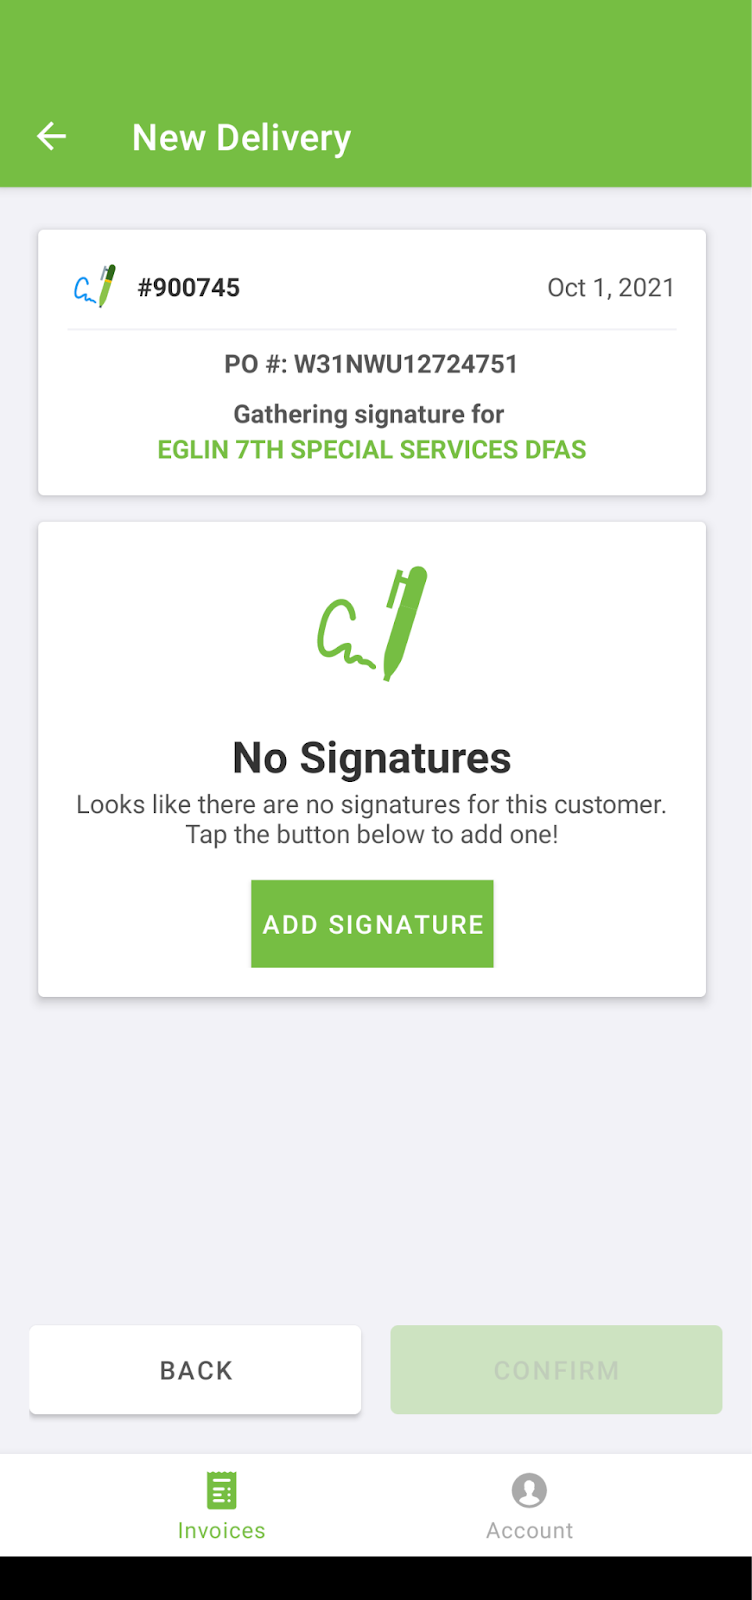
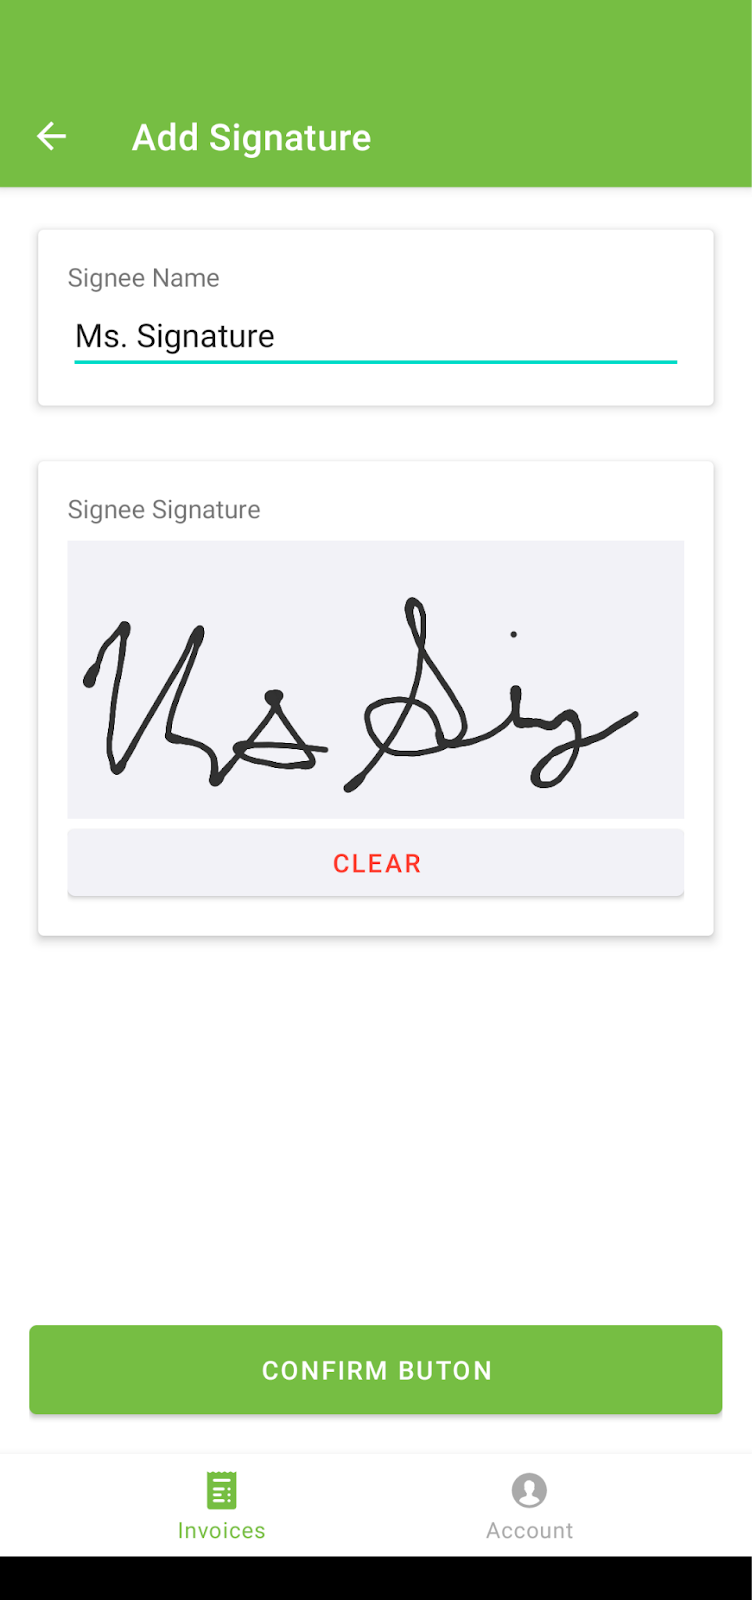
This delivery state collects a customer signature and associated metadata (where and when). In addition, signatures are stored per delivery location so the same customer does not have to sign many times over. To add a signature, click the “add signature” button. From this screen, a customer may type in their name and subsequently use their finger or a capacitive stylus to digitally create their signature. If there is an error, the customer may clear the signature field and try again by tapping the “CLEAR” button. Once the signature is complete, the driver or customer will tap “CONFIRM” to save their signature.
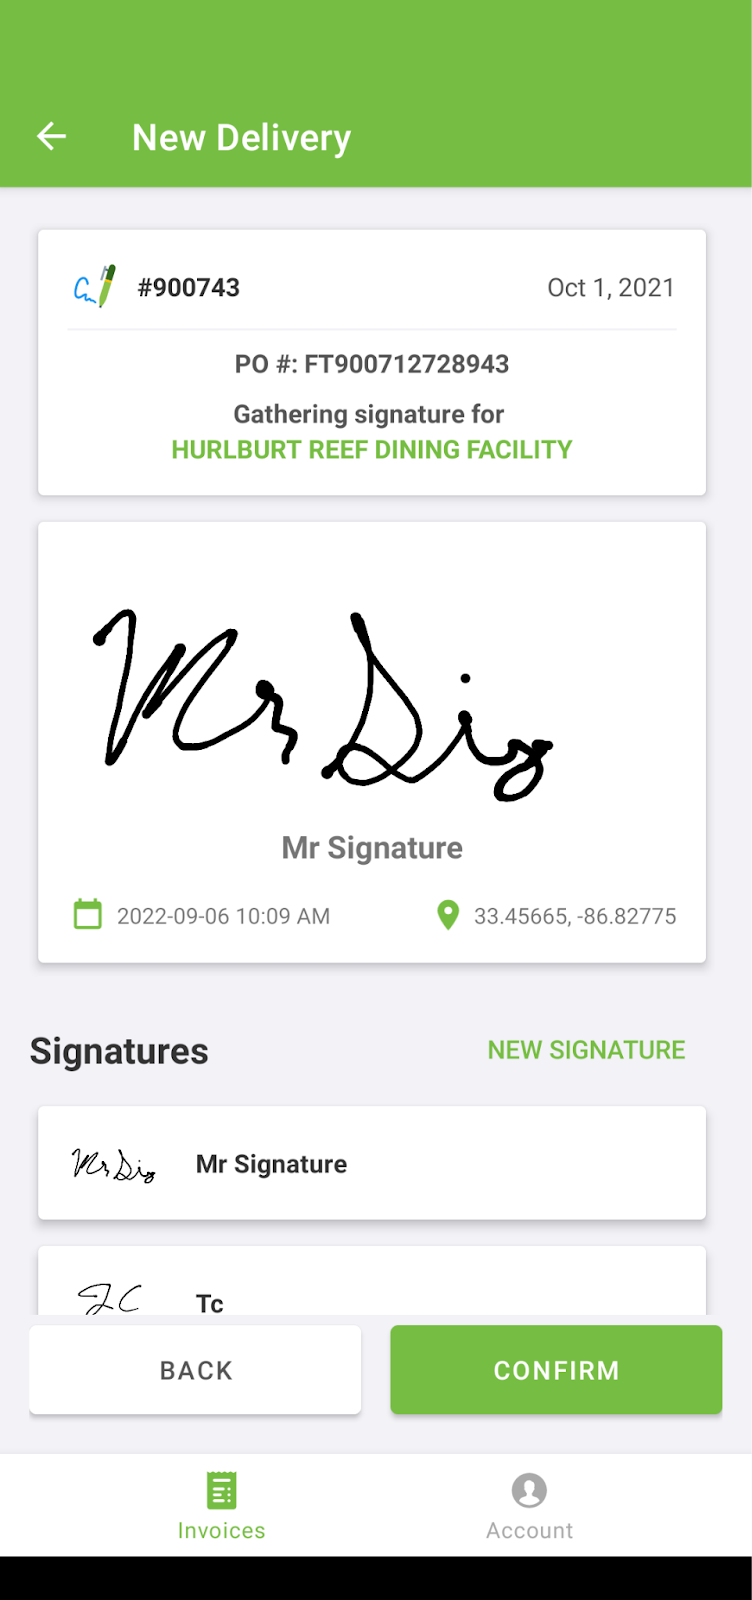
A newly added signature will be automatically attached to the invoice being completed and shown at the top. For repeat customers, the most recently used signature will auto-attach to the invoice. If a driver sees a different person receiving than the one whose signature is auto-attached, they may add the person or select from a list of recent signatures.
Image Capture
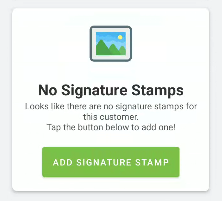
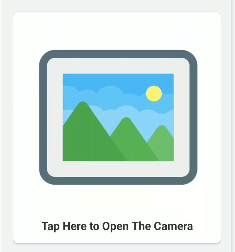
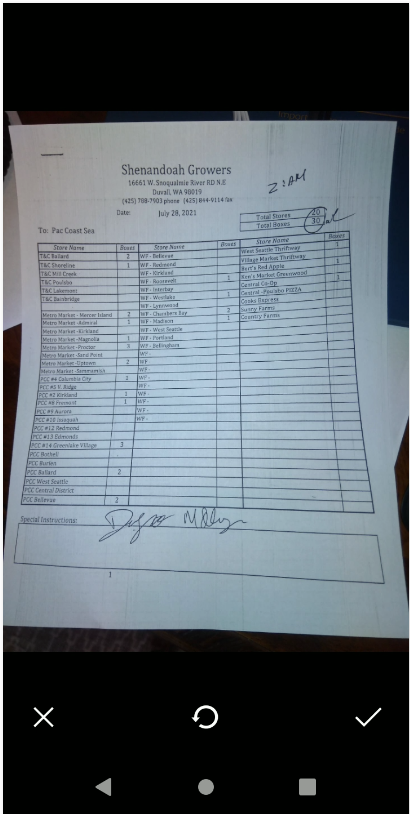
Some customers require an image of a delivery ticket or something similar provided by the receiving dock. Please check the camera for dirt, grease or other debris and consider wiping the lens off before taking the picture. The image capture is started by taping this button
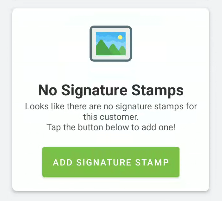
When you click Add Signature Stamp you will be prompted to open the camera, then open the camera.
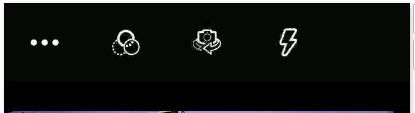
We recommend you turn the flash on, if it is set to Auto by tapping the flash/lightning bolt icon
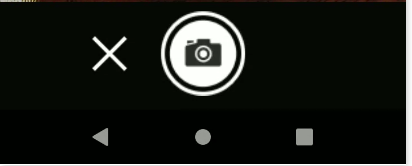
Center the image on the screen and click the camera shutter button.
The captured image will be on the screen. Make sure it is legible, then click the check box.
Provide a caption describing the form, such as lumper ticket, receipt ticket, etc and click Confirm
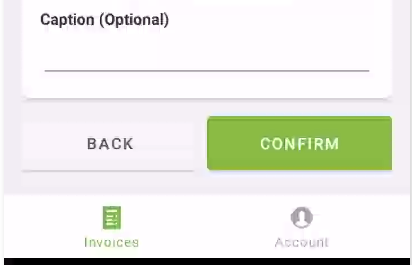
Once the entire delivery is confirmed this image will be stored with the delivery.
Cash-on-Delivery and Invoice Confirmation
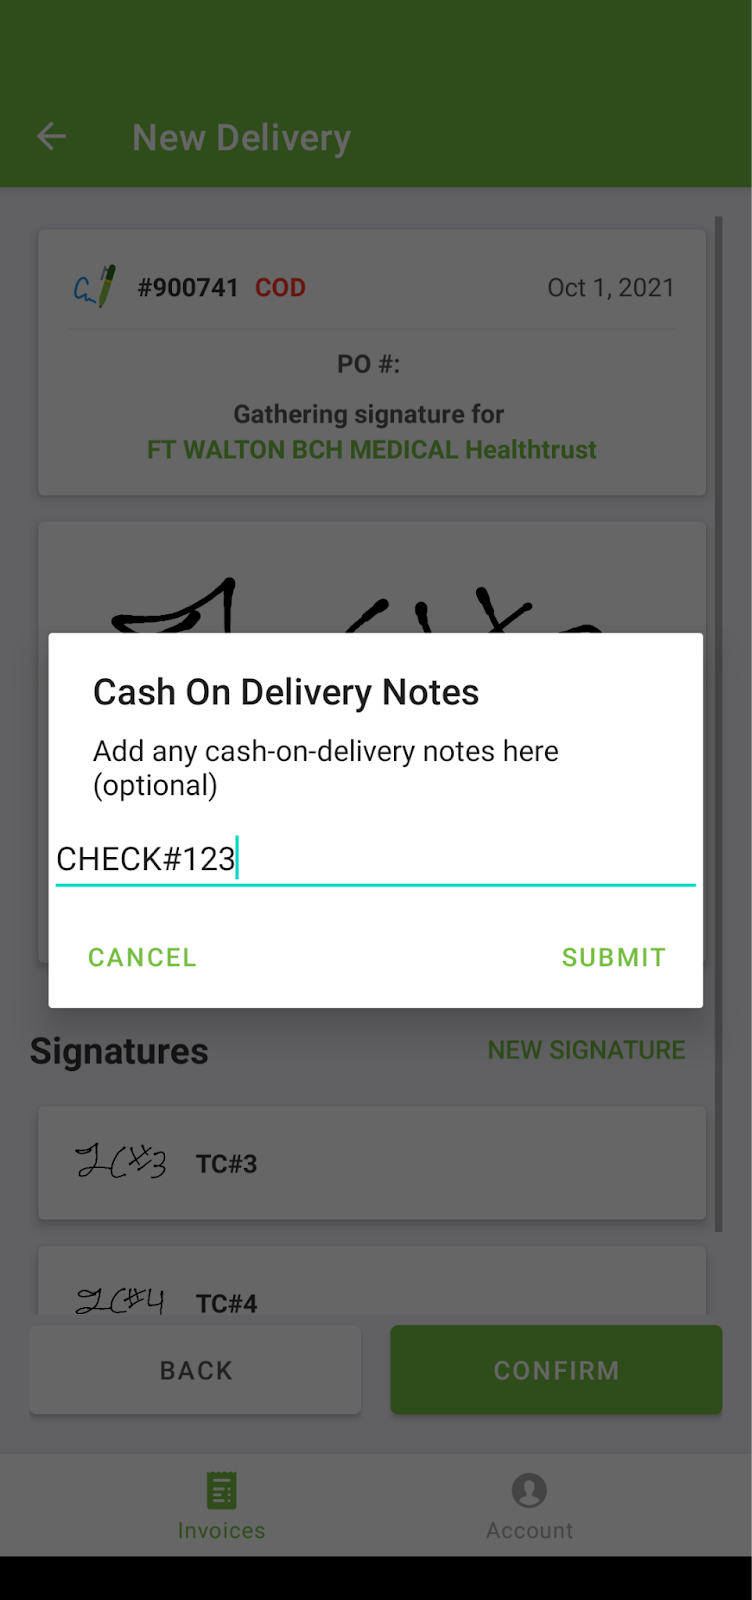
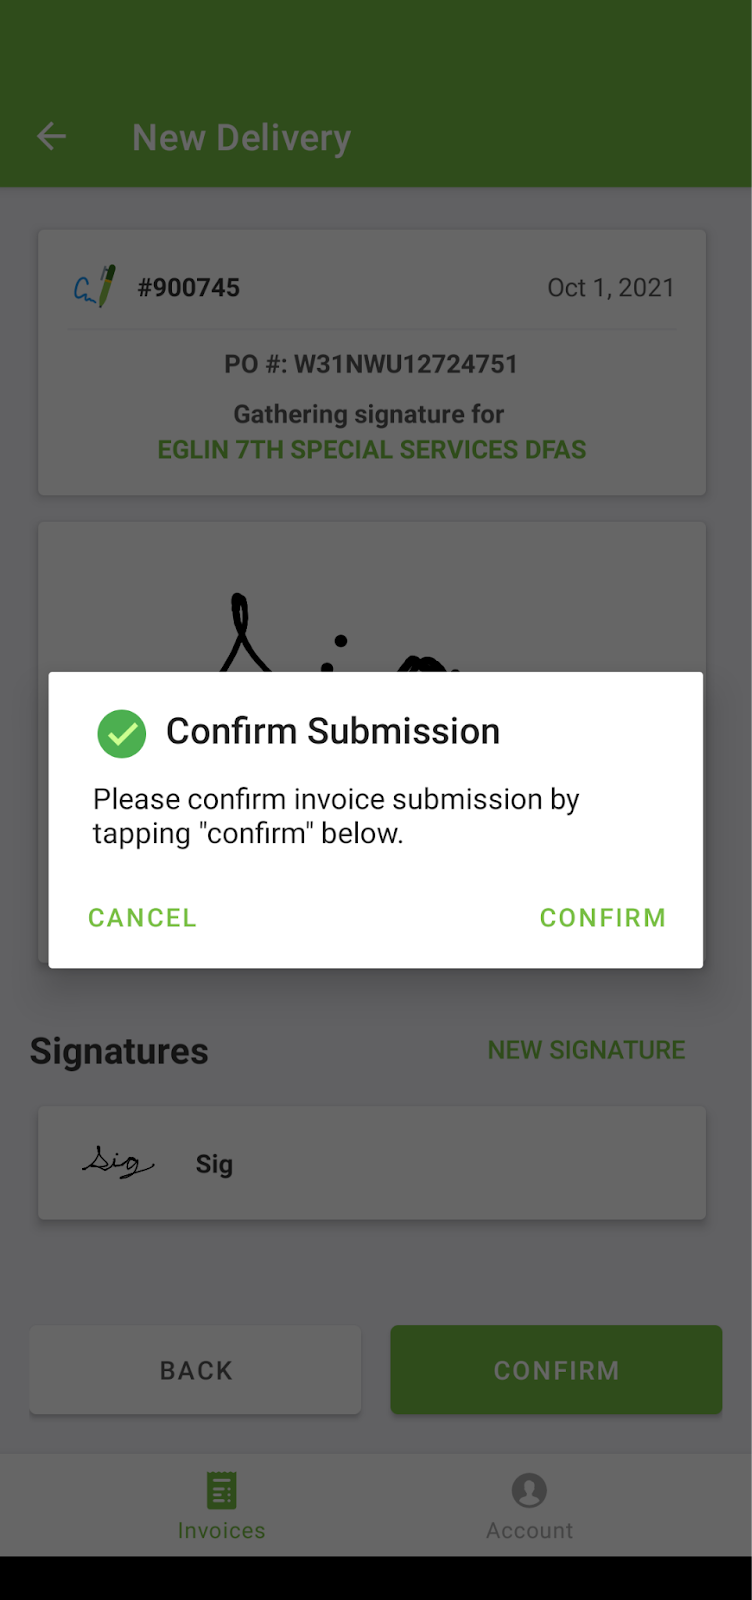
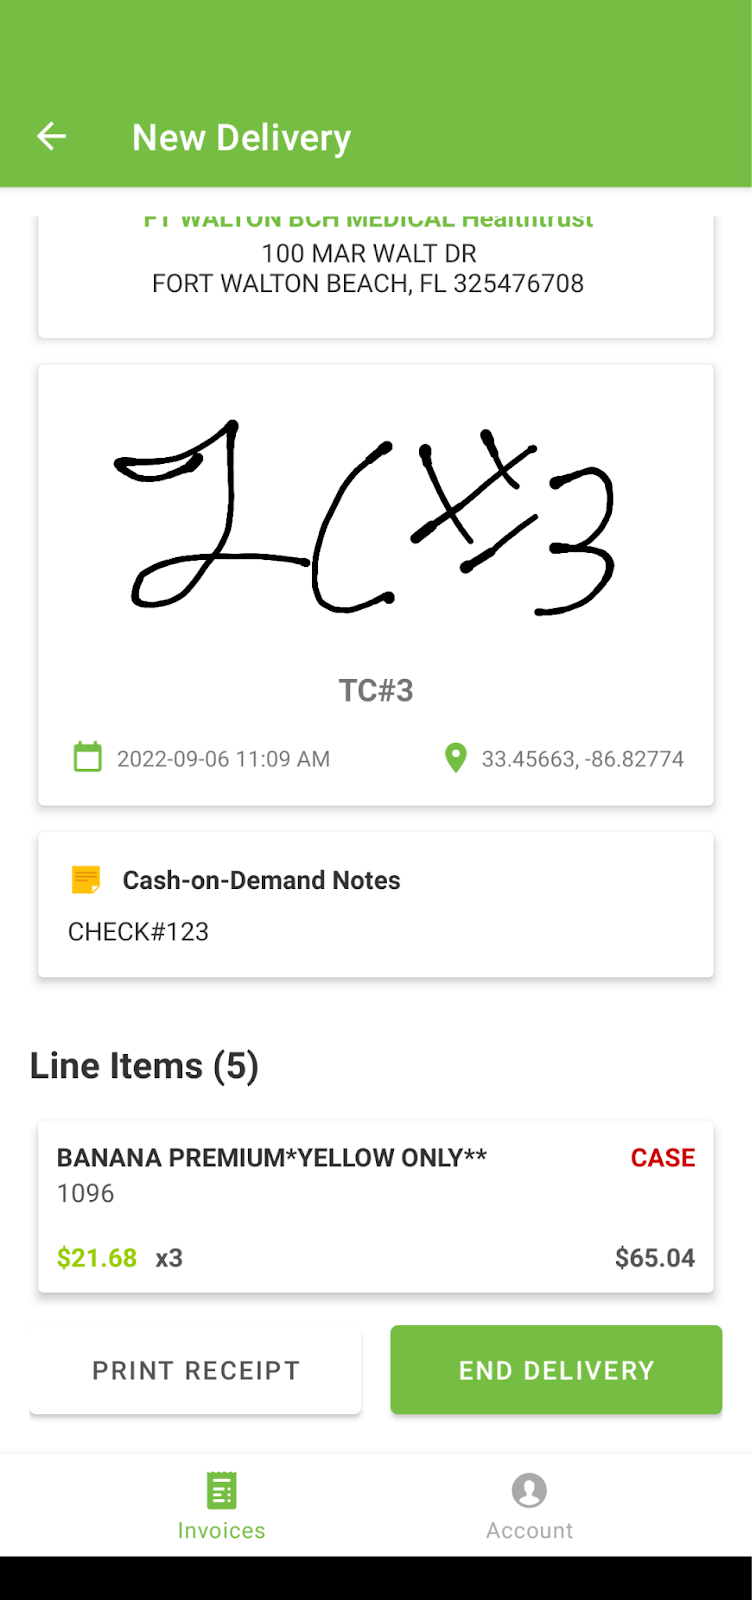
From here, tapping the confirm button in the bottom right corner will confirm the signature for the invoice and submit it. In the event that cash-on delivery terms exist (see section Sprout Operations > Cash on Delivery for details), a special notes field will appear for the driver to attach relevant information (e.g. “check #123”). If not, cash on delivery terms exist, then app proceeds directly to the submission confirmation screen.
- Delivery Summary
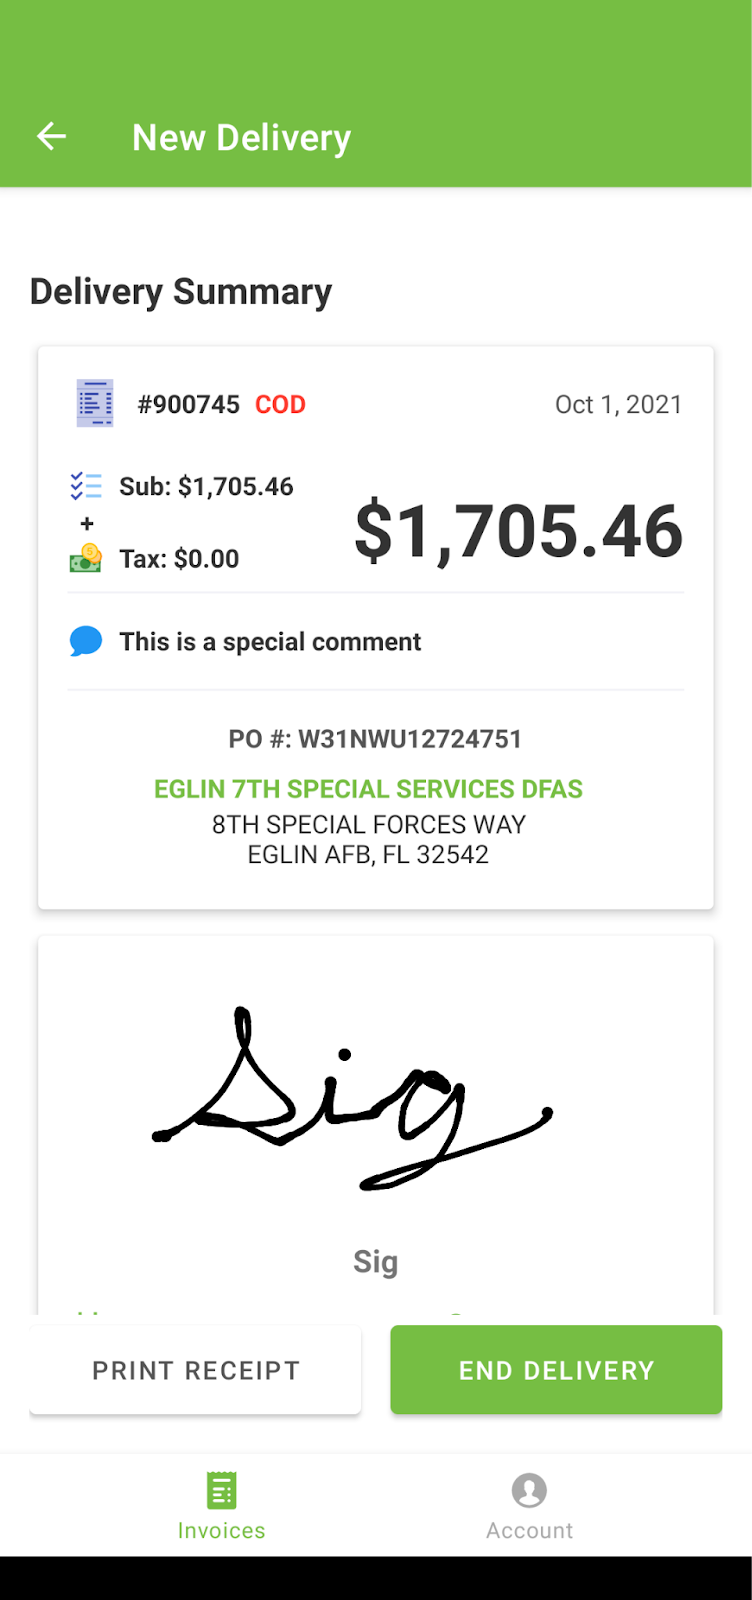
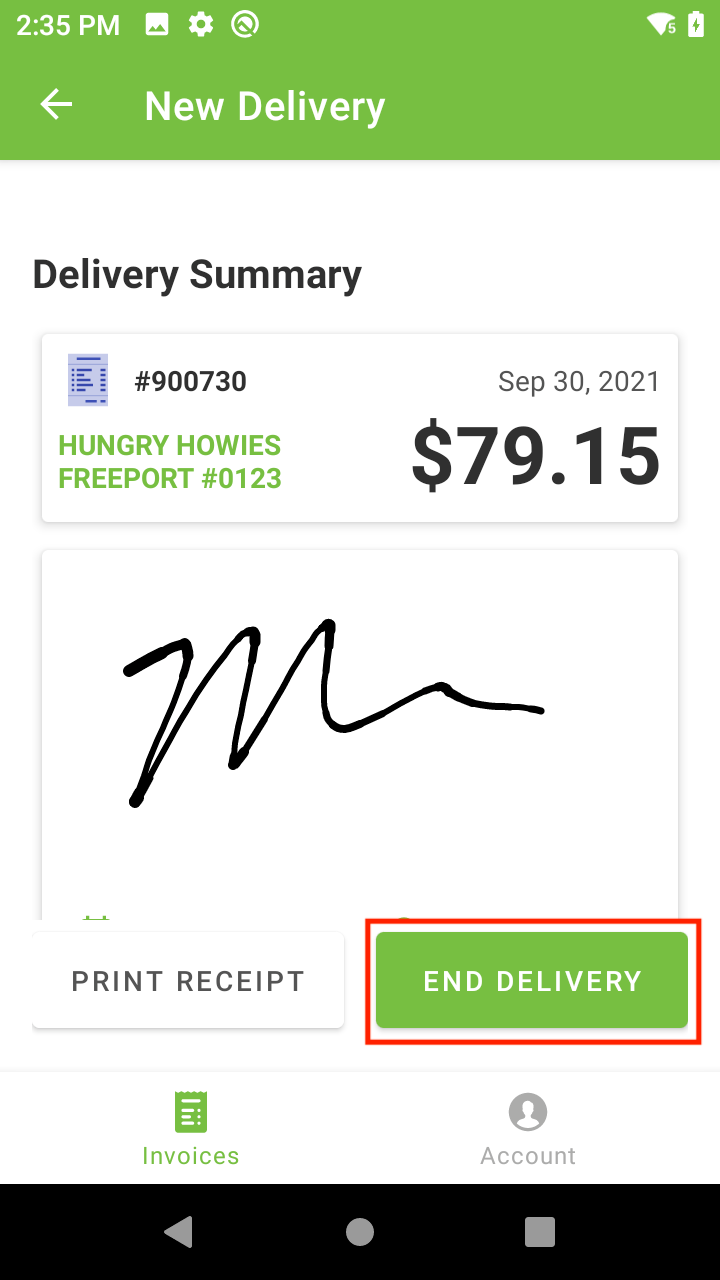
The delivery summary page contains an order summary and information about the delivery such as customer signature and other metadata. From this screen, a driver may generate an email or physical receipt by tapping “PRINT RECEIPT” or end the delivery by tapping “END DELIVERY”. Some example screenshots of this delivery state can be found below.
Completed Deliveries
After a delivery is complete, they may access the Delivery Summary page again by tapping on the completed delivery in the Orders List. This is helpful in case there is a need to generate another receipt or review the details of a delivery after it has happened.
- Generating a Receipt
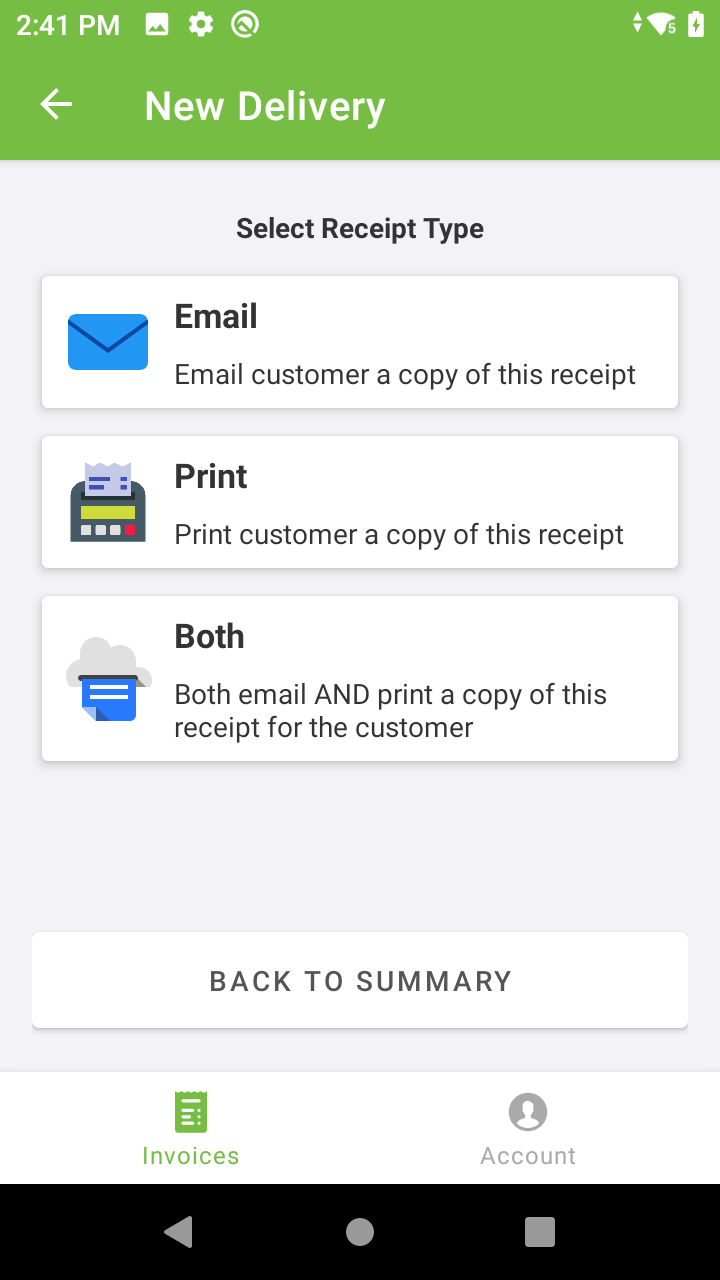
A user may generate a receipt by selecting from one of three available receipt types:
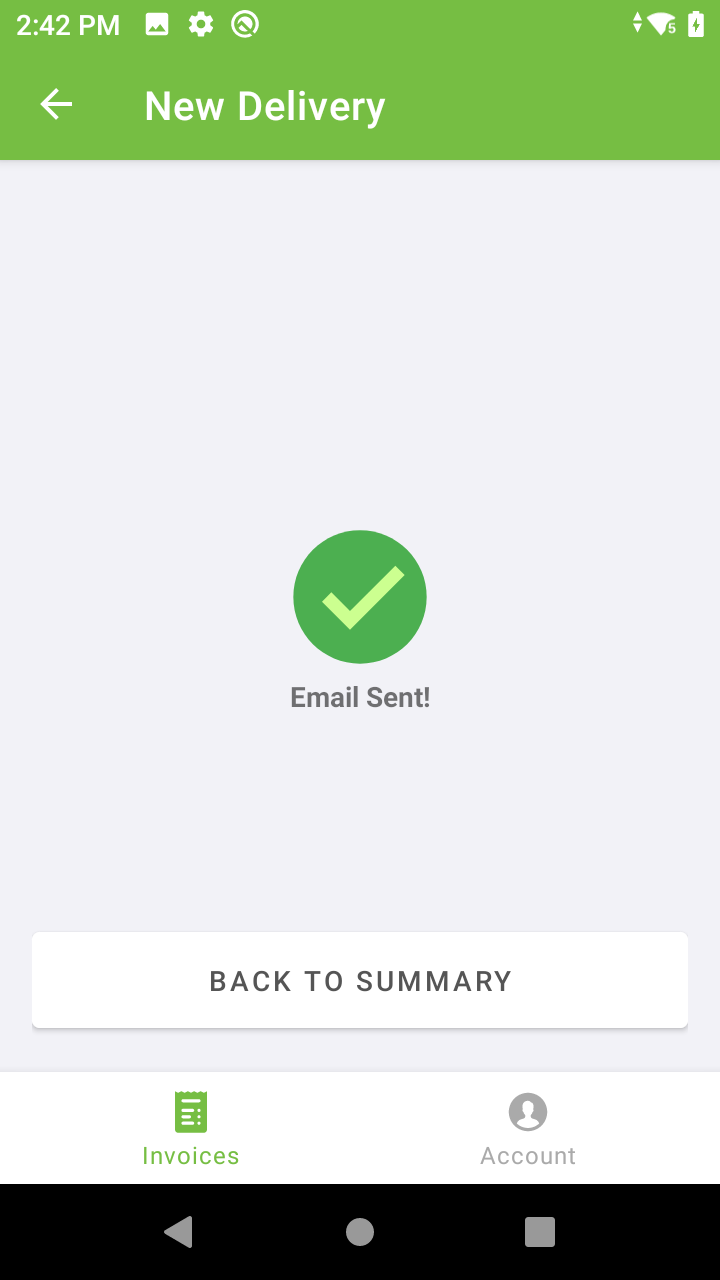
- Uses the customer email on file to generate an email with an invoice PDF attached
- Uses the mobile receipt printer to print a physical receipt for the customer
- Both
- Uses both of the above to send a PDF and print a physical receipt
Email Receipt Flow
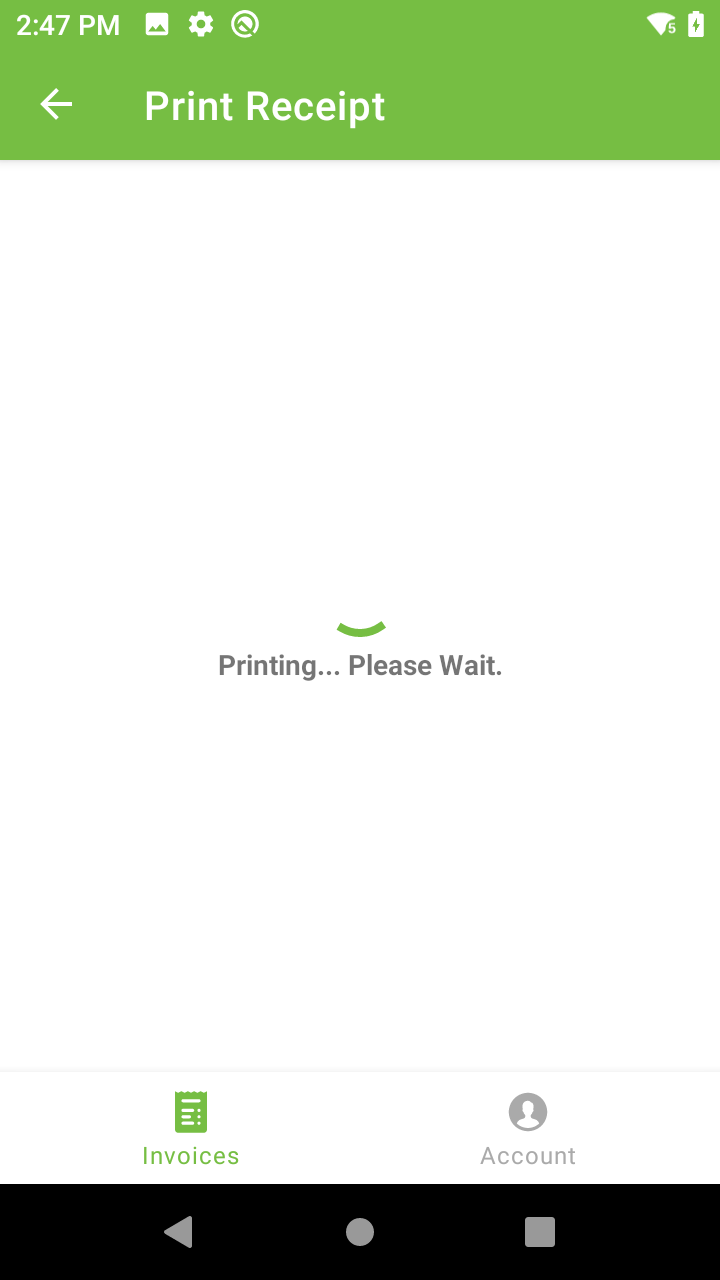
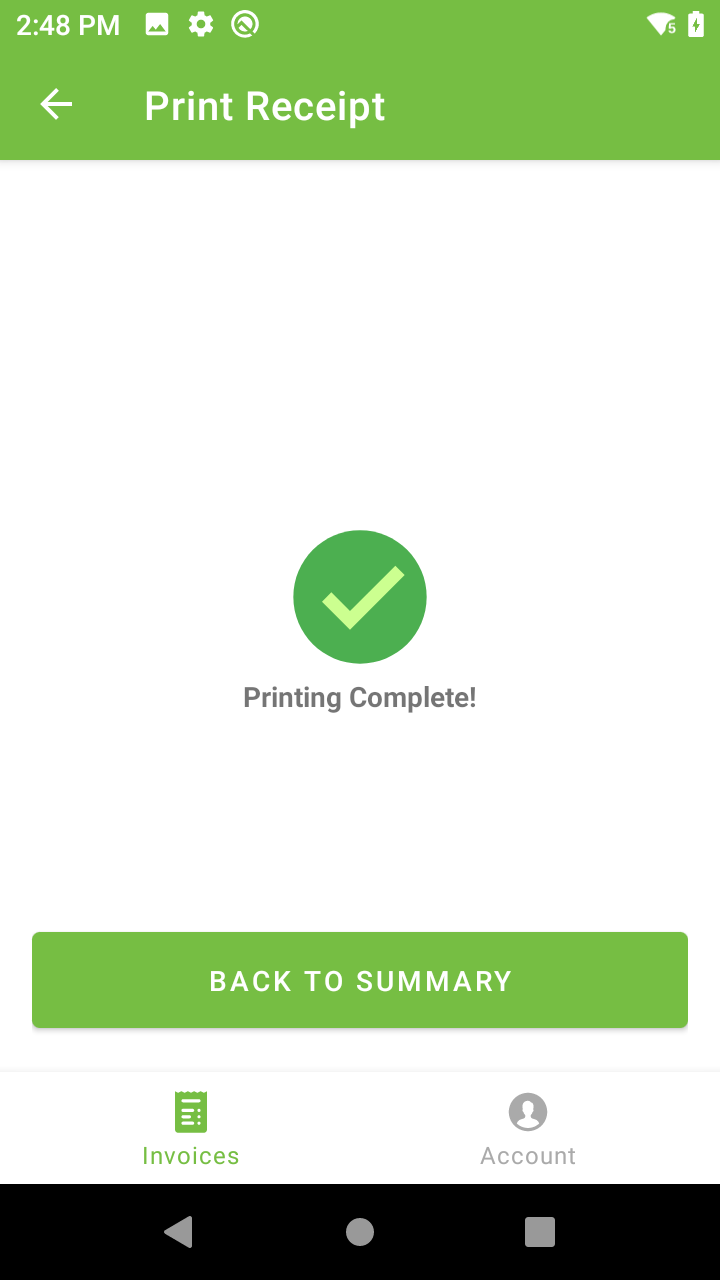
Print & Both Receipt Flow
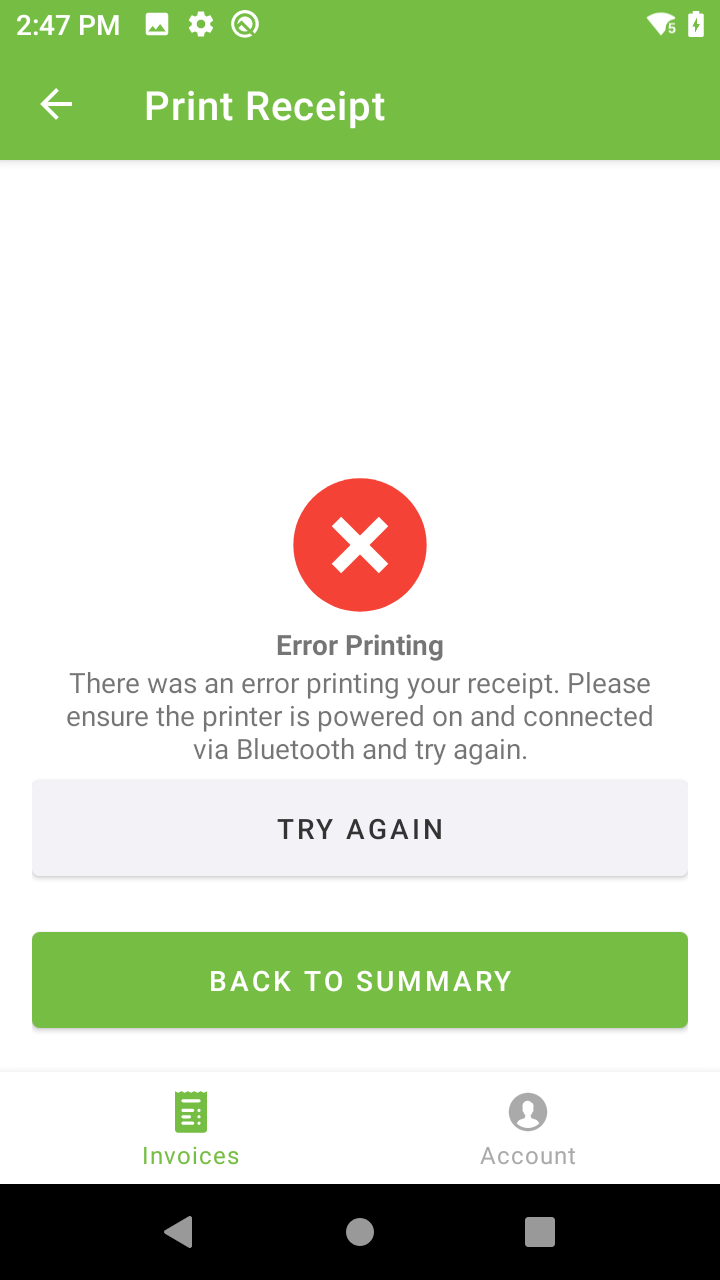
Printing Error
In the case of a printing error (such as a broken bluetooth connection), the screen below will be presented which allows the driver to retry the print.
- Completing the Delivery
On the Delivery Summary screen, there is a button entitled “End Delivery” which marks the delivery as completed and indicates the driver is leaving the site. A screenshot of this delivery state can be found below.
Signing Out
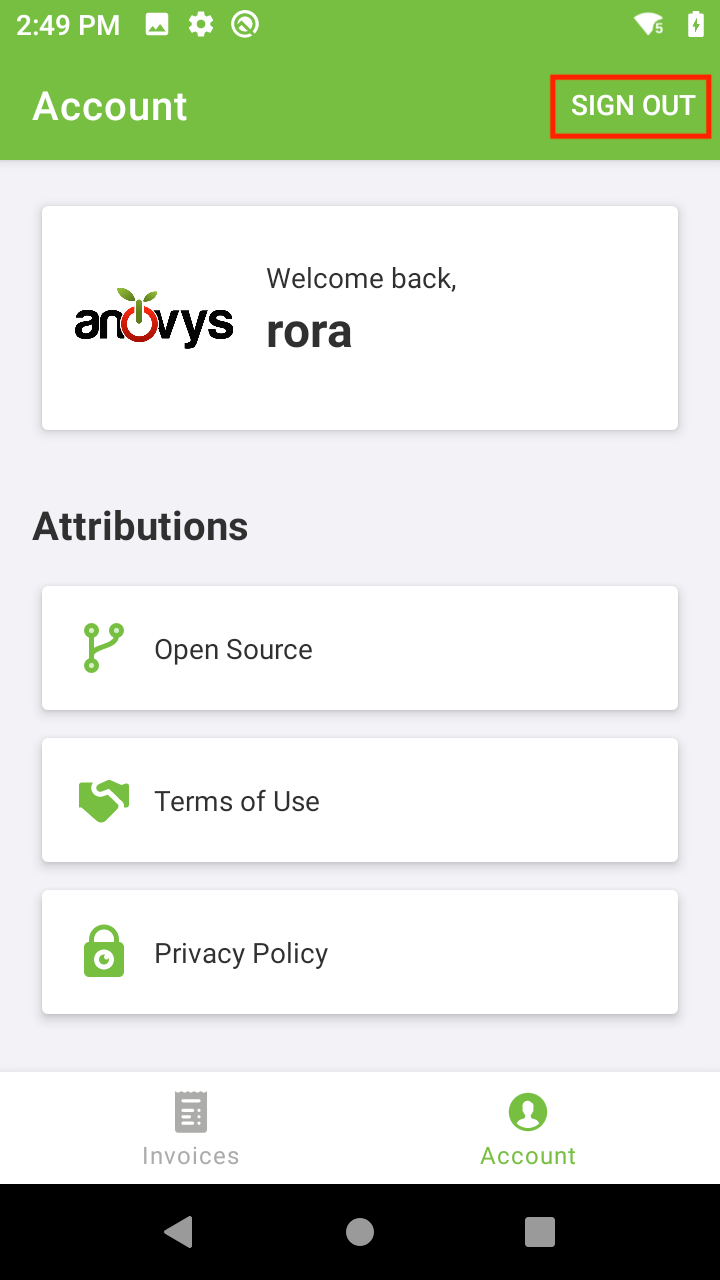
The Sprout Driver app has a second tab labeled “Account” for verifying who is currently signed into the app and managing the sign out process. In order to sign out, a driver taps the “SIGN OUT” button in the top right corner of the screen. A screenshot below shows the account screen and highlights the sign out button.